
The purpose of this document is to create a step by step guideline for using the Oracle Data Guard a High available mechanism.
The Oracle version is 11gR2.
We will first introduce to you the Oracle Data Guard. We will define the requirements for this demonstration.
We will create 2 windows virtual machines using Oracle virtual Box. Then, We will set up the Primary database.
After that, we will use Recovery Manager RMAN to create the Standby database, and, we will check the Data Guard environment.
In the end, we will turn on the Active Data Guard option, new with 11g.
1- What is Oracle Data Guard?
The primary database is the production database, and the standby database is the remote, secondary database.
Oracle Data Guard is an option to the Oracle RDBMS. It maintains a standby database as an alternative database to primary database.
In the event of failure, the standby database can be activated and assume the primary database role.
Oracle physical standby protects from user and logical errors by maintaining consistent copies of redo data of the primary database at the standby database.
The Oracle physical standby database is kept synchronized with the primary database by using media recovery to apply redo data that was generated on the primary database (REDO APPLY).
The Oracle logical standby database is kept synchronized with the primary database by using media recovery to apply redo data into SQL statements and then executing those SQL statements against the standby database (SQL APPLY).
2- Set up of windows virtual machines
- Download Virtual Box: Download the last version from Virtualbox.org
- Use the official manual to install Virtual Box Manual
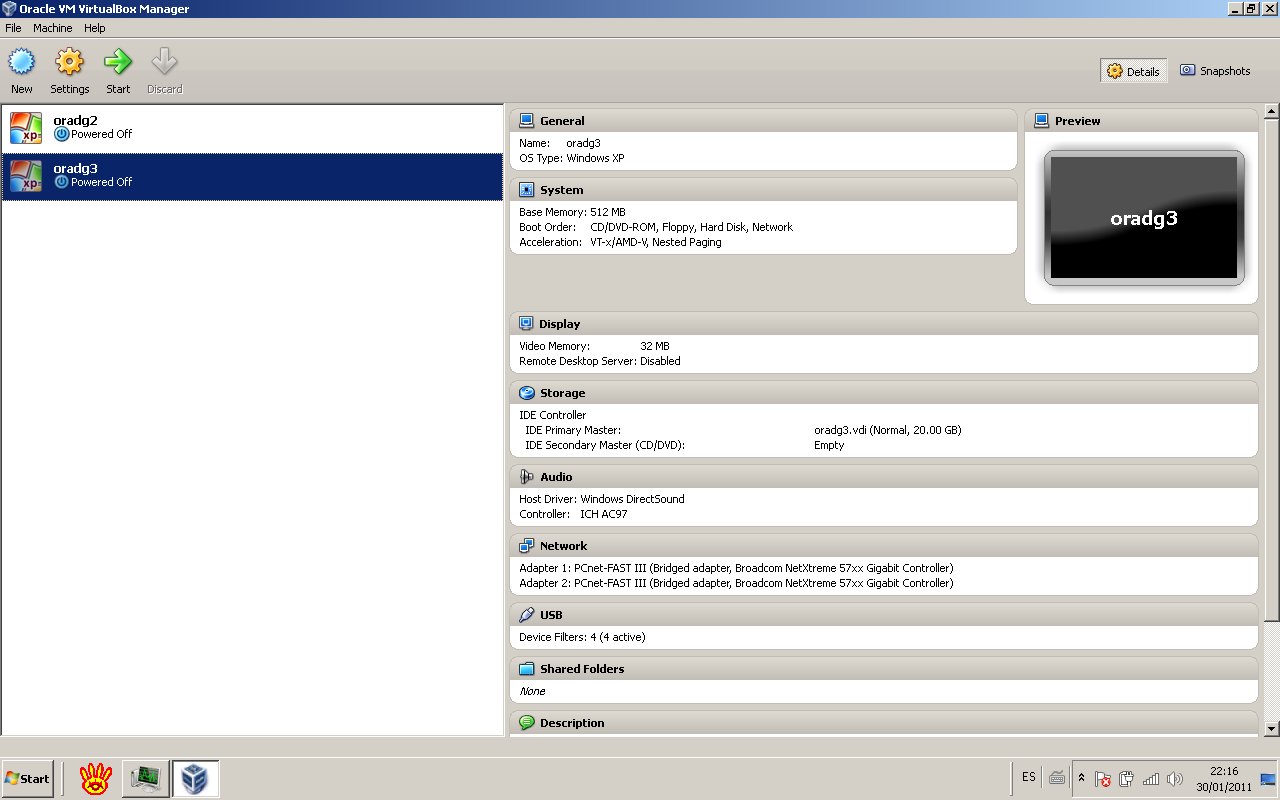
- OS Names: “oradg2″ for the Primary database and “oradg3″ for the Standby database.
- OS type: windows xp (32 bit)
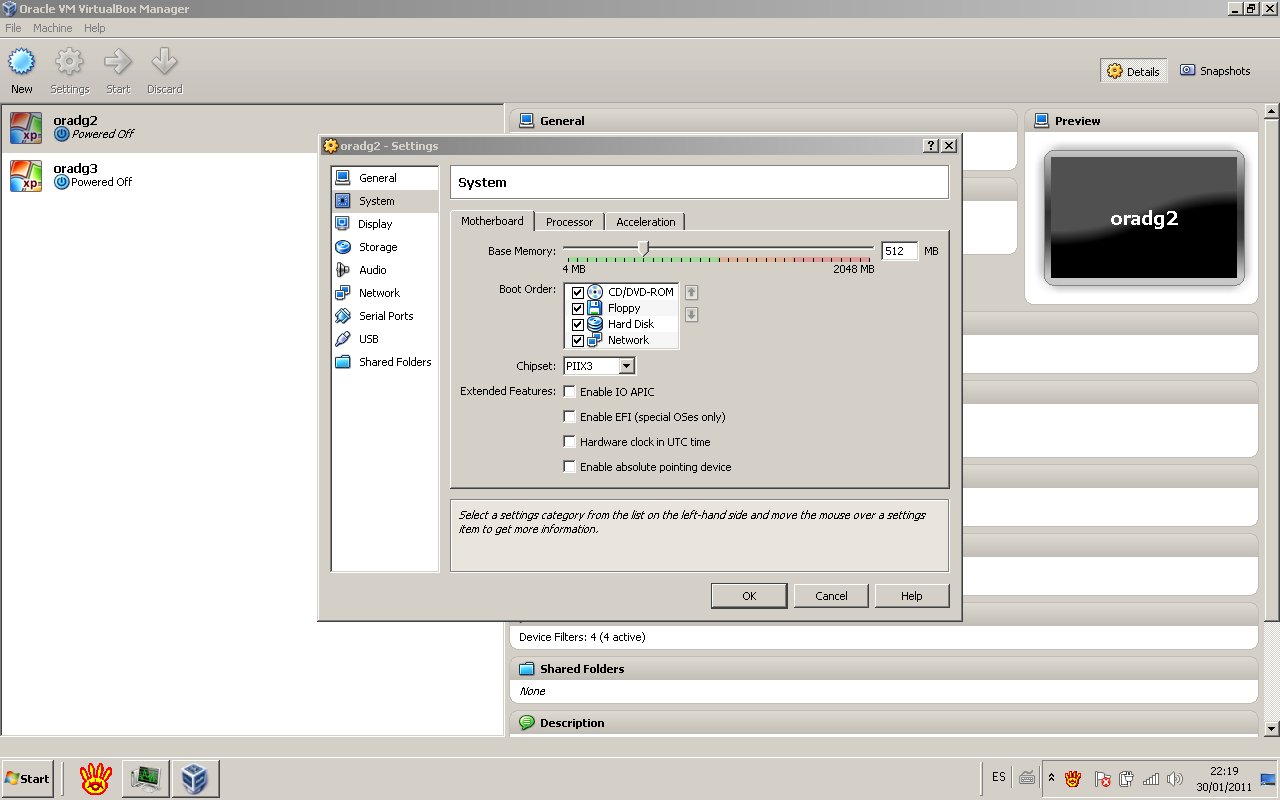
- Virtual Memory: 512Mb for each virtual machine.
- Host Memory: 2GB.
- Hard Drive: 20GB for each virtual machine.

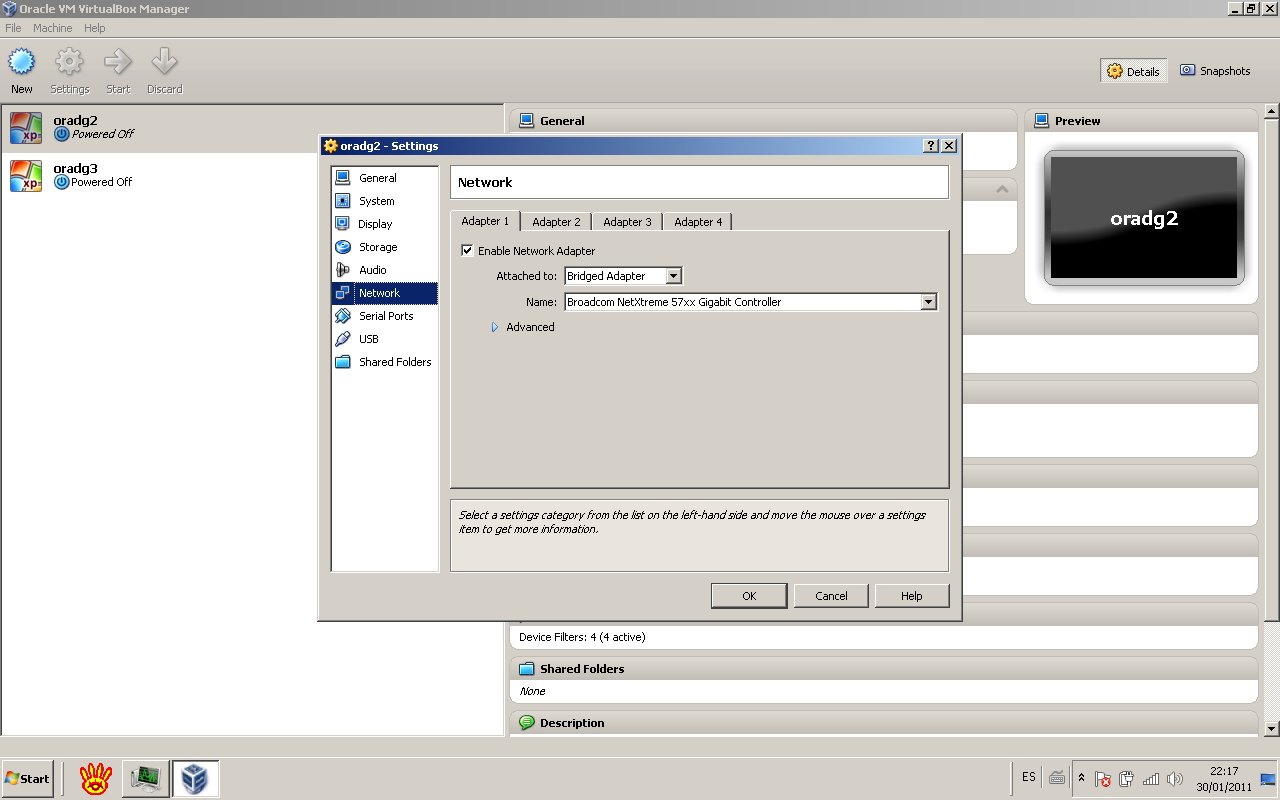
- Set up the network connectivity:
Ping the Standby server from the Primary server: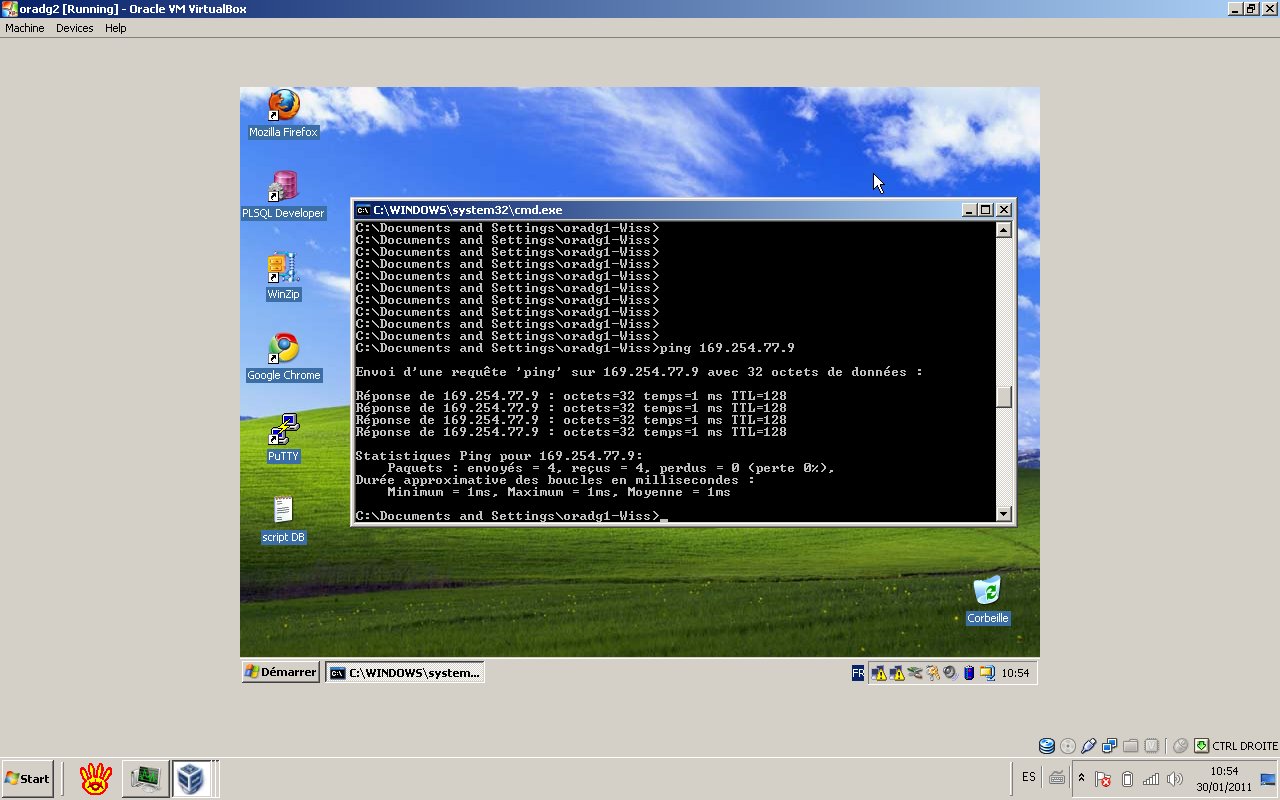
Ping the Primary server from the Standby server: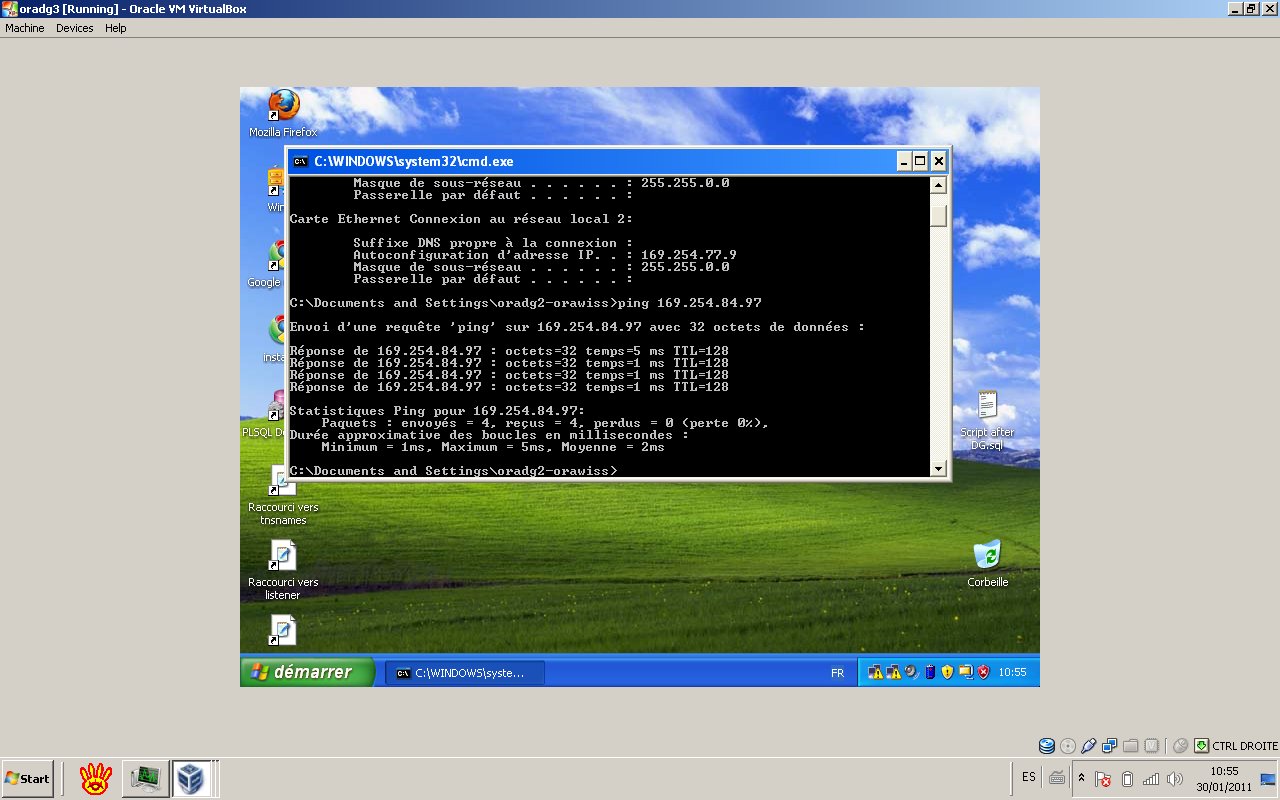
- Download and install Oracle 11gR2 (32 bit) for windows:
+Install binaries.
+Install the database, Enterprise edition. (using DBCA)
+Set up Oracle net components (using NETCA)
+Test sql net connectivity.
3- Prerequisites
- The primary and standby databases must be using the same version of Oracle Database 11g. In our case, we are using 11gR2.
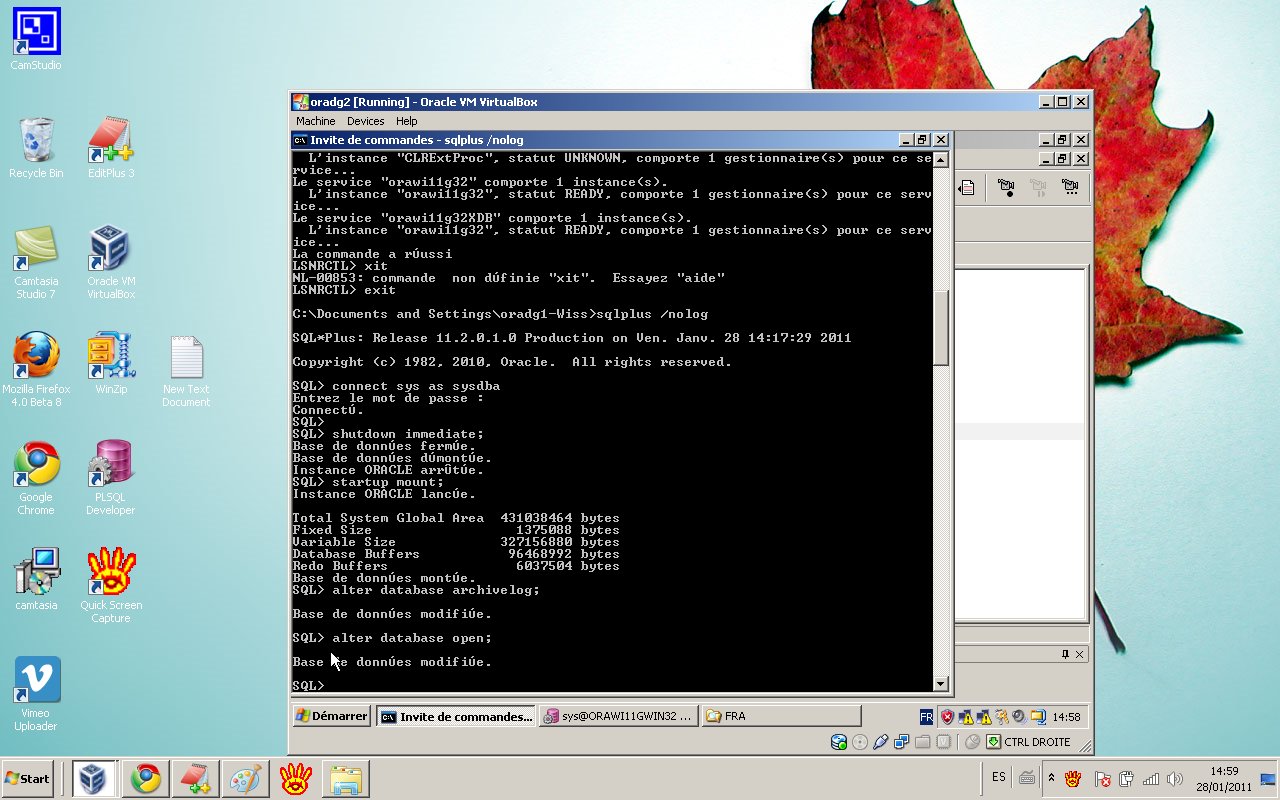
- The primary database must be opened in ARCHIVELOG mode.
- Oracle Net Services network files must be set up on the primary database and on the standby database.
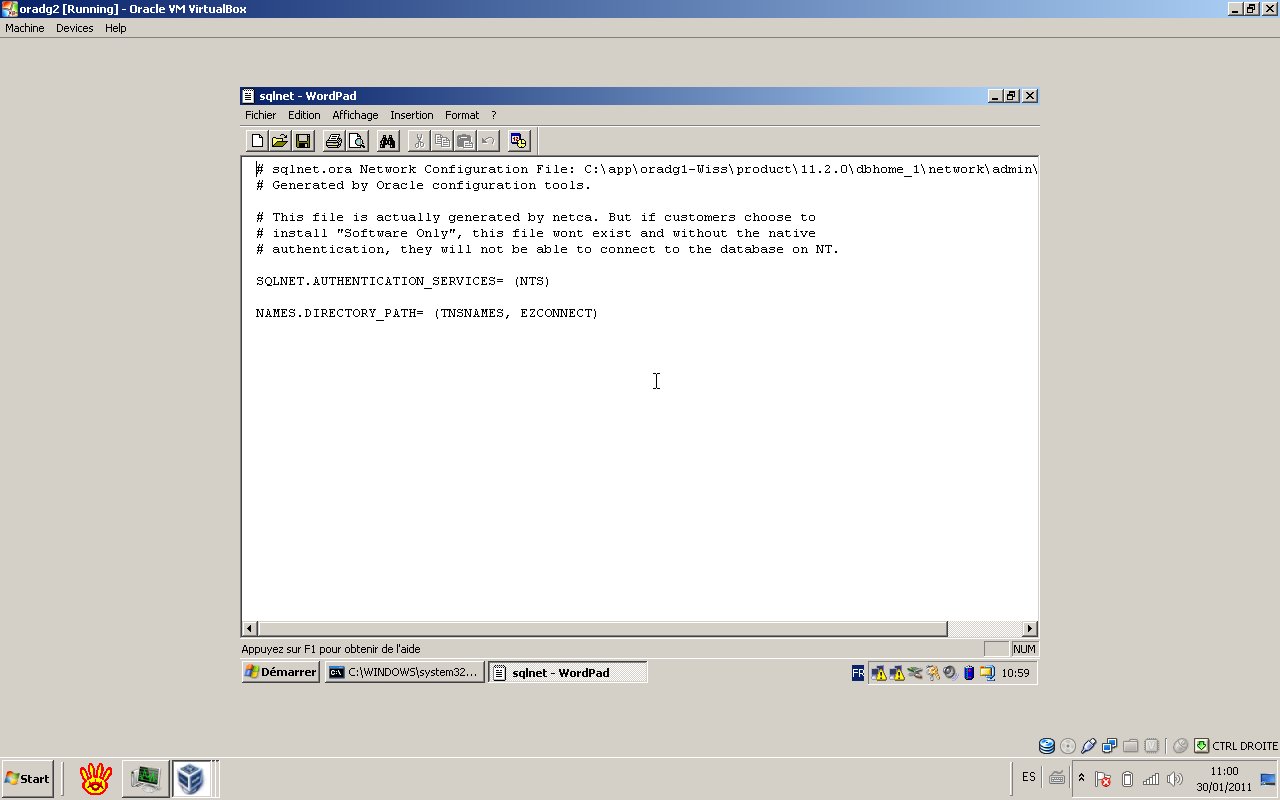
SQLNET.ORA file of the Primary:
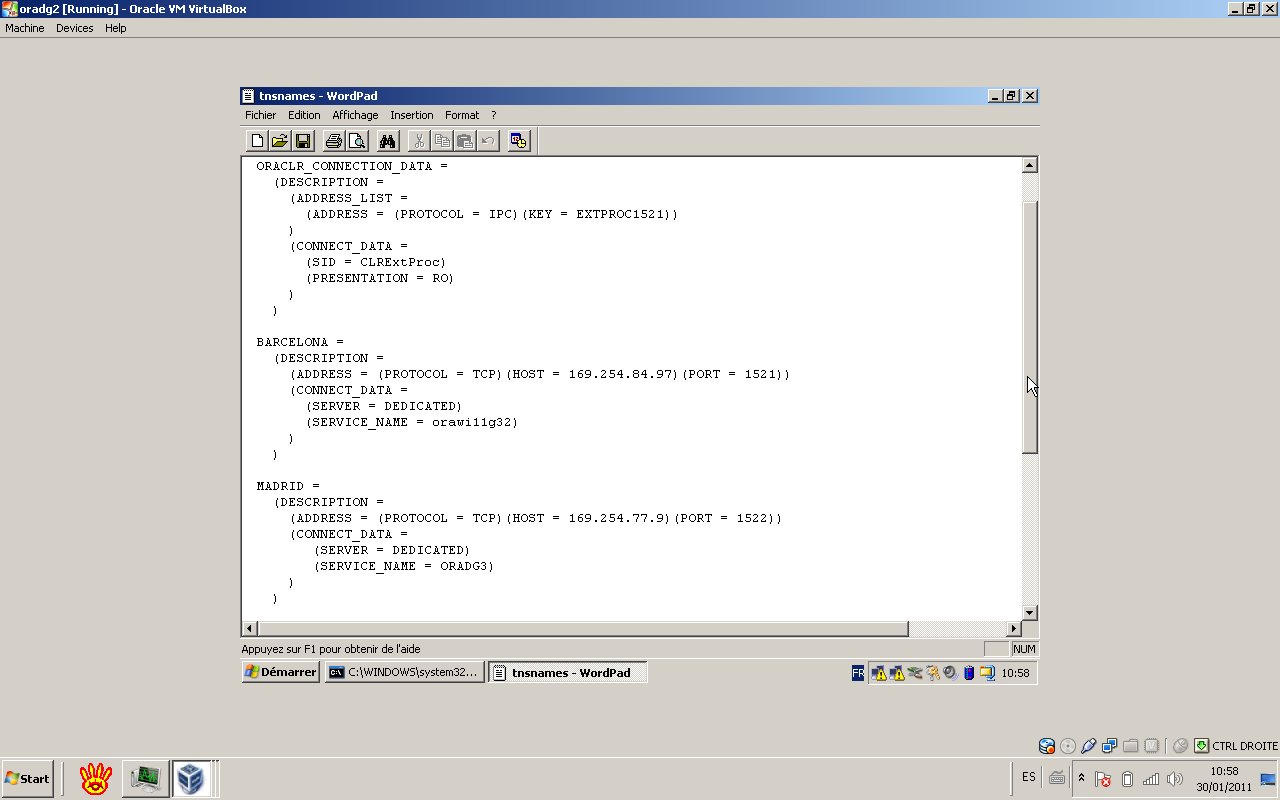
TNSNAMES.ORA file of the Primary:
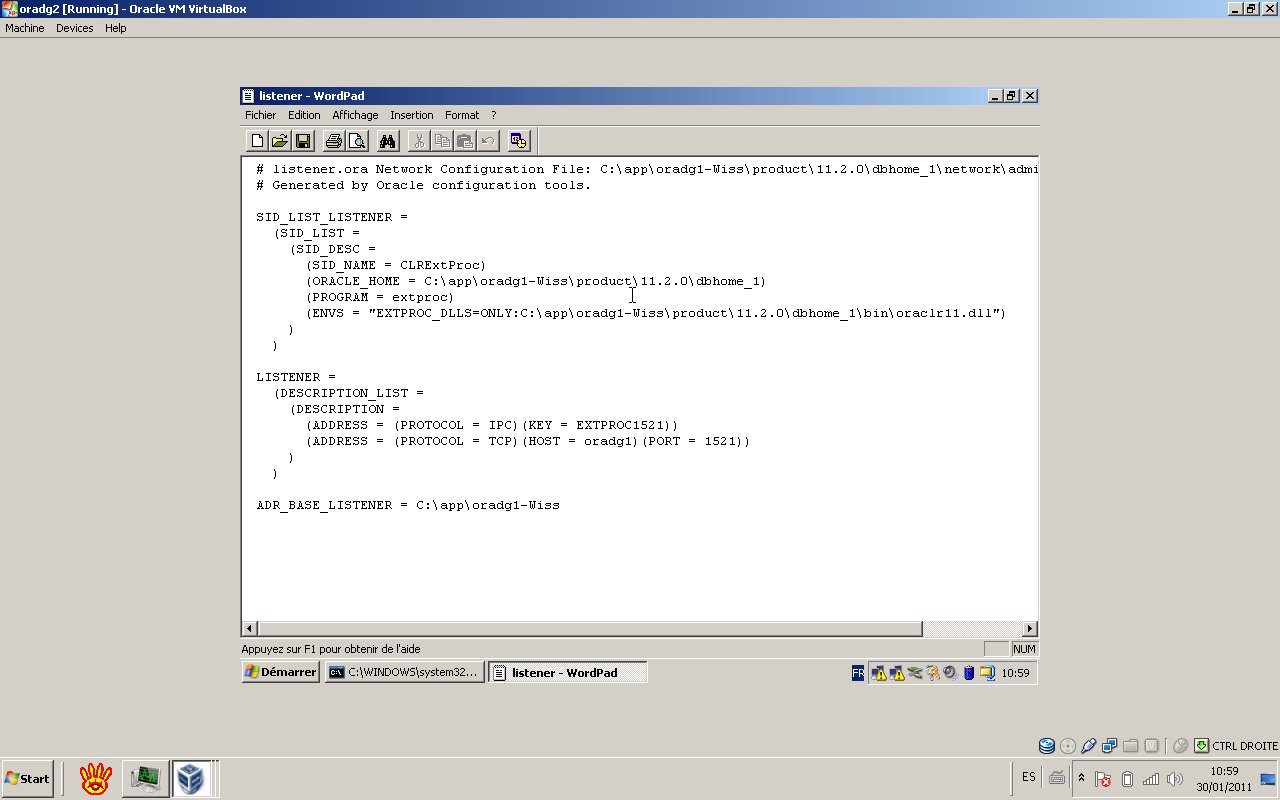
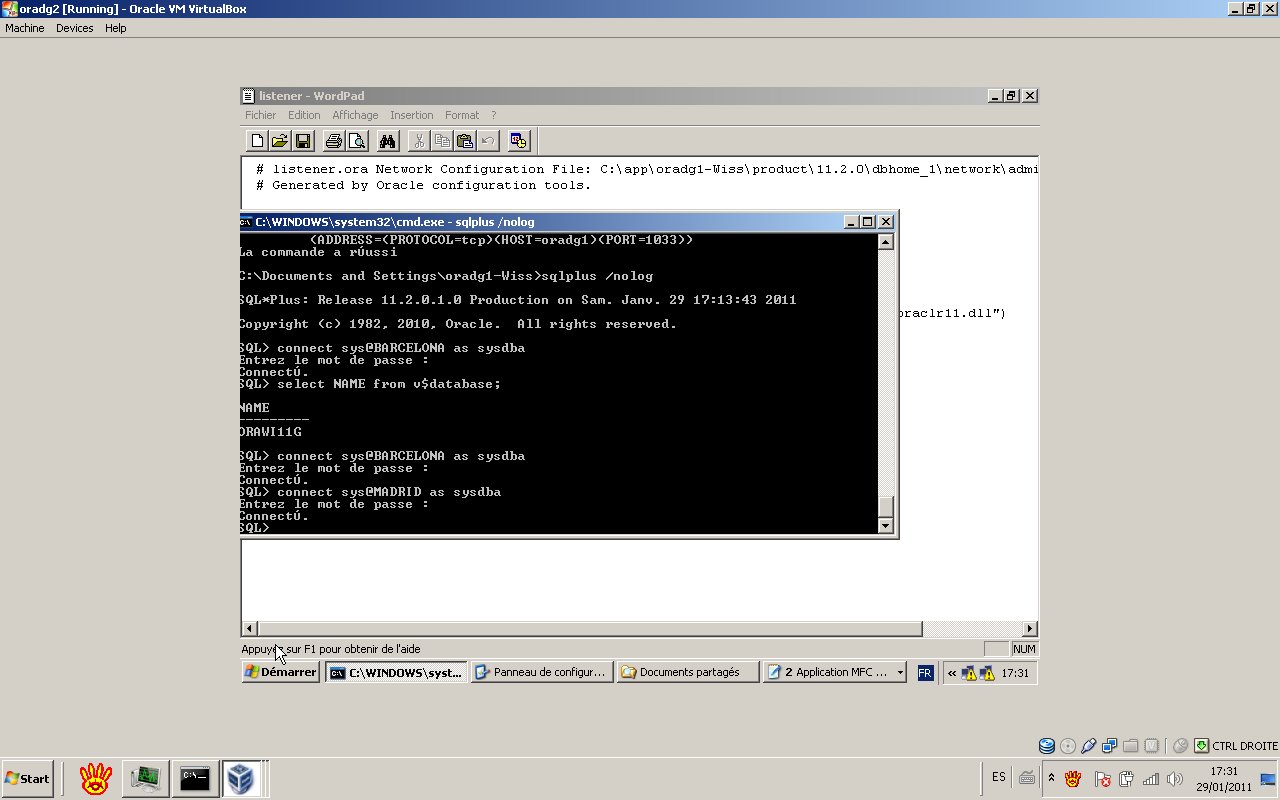
LISTENER.ORA file of the Primary:
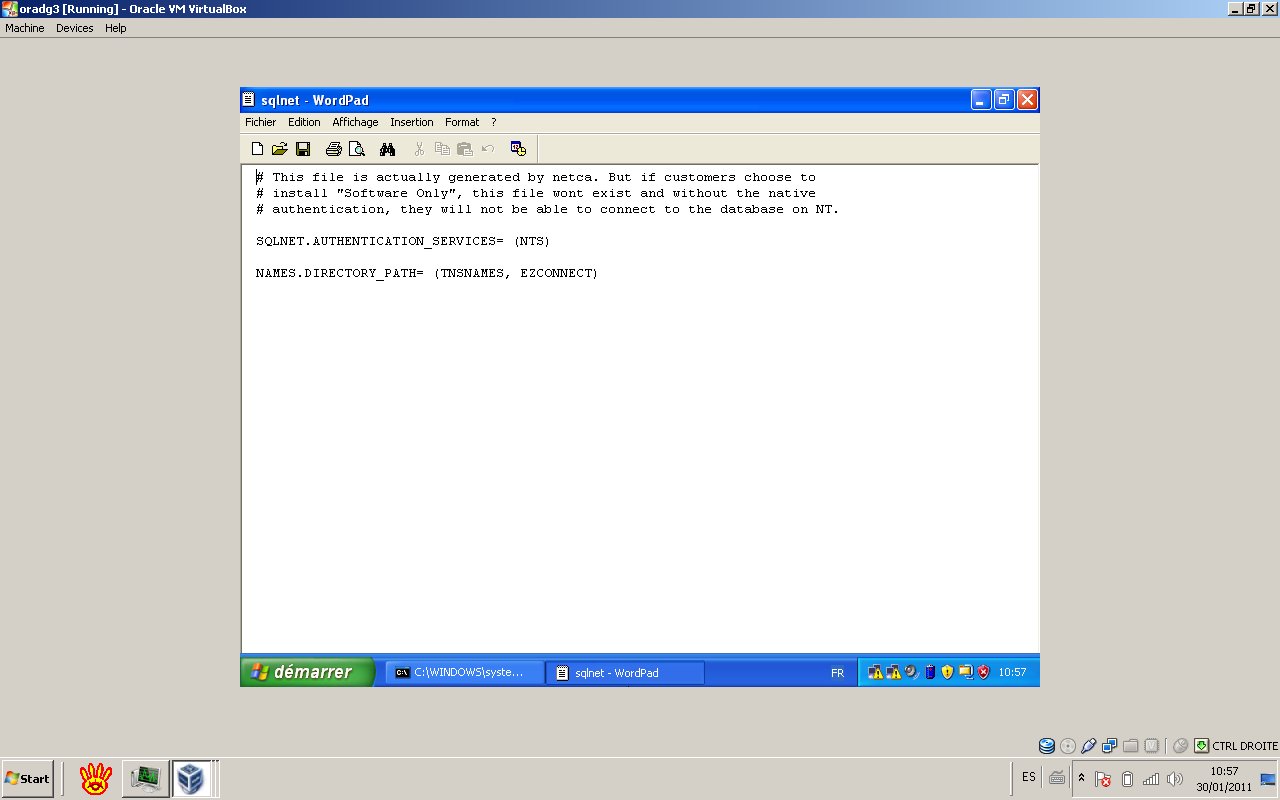
SQLNET.ORA file of the Standby:
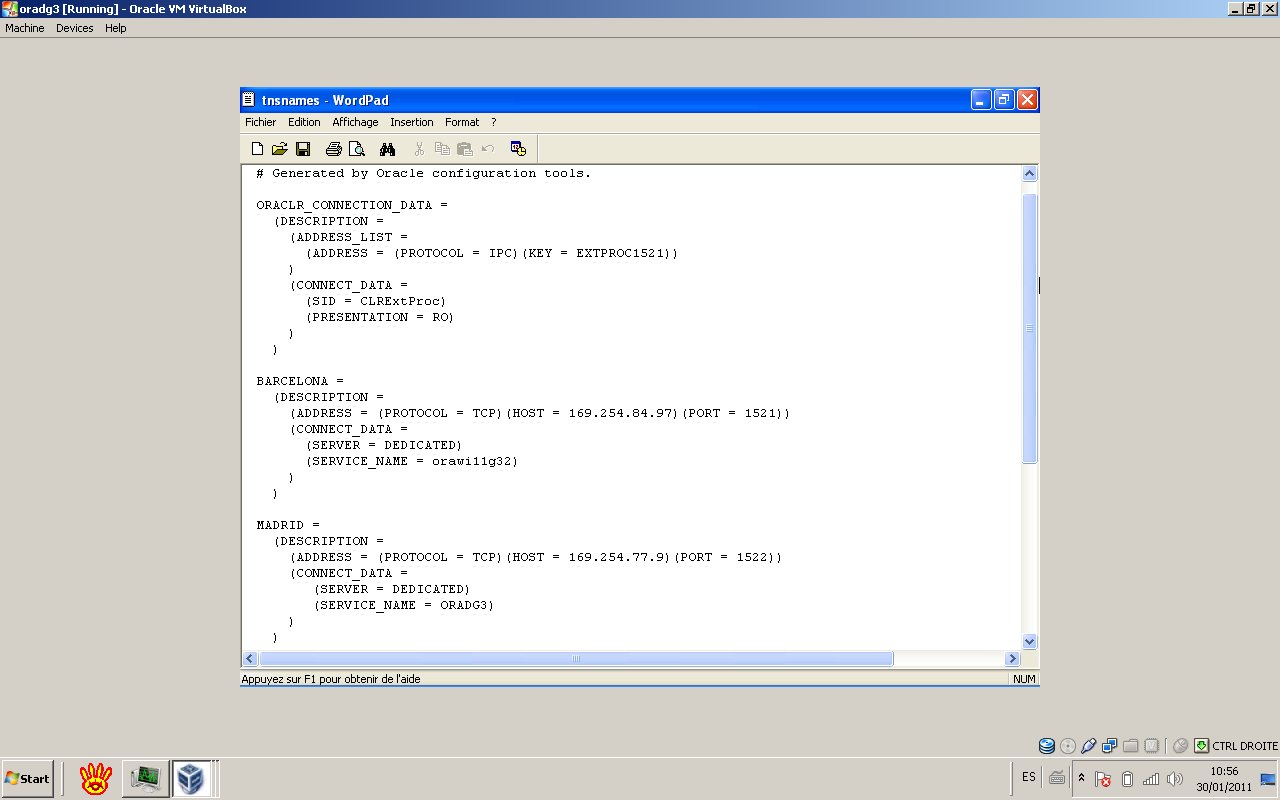
TNSNAMES.ORA file of the Standby:
LISTENER.ORA file of the Standby:

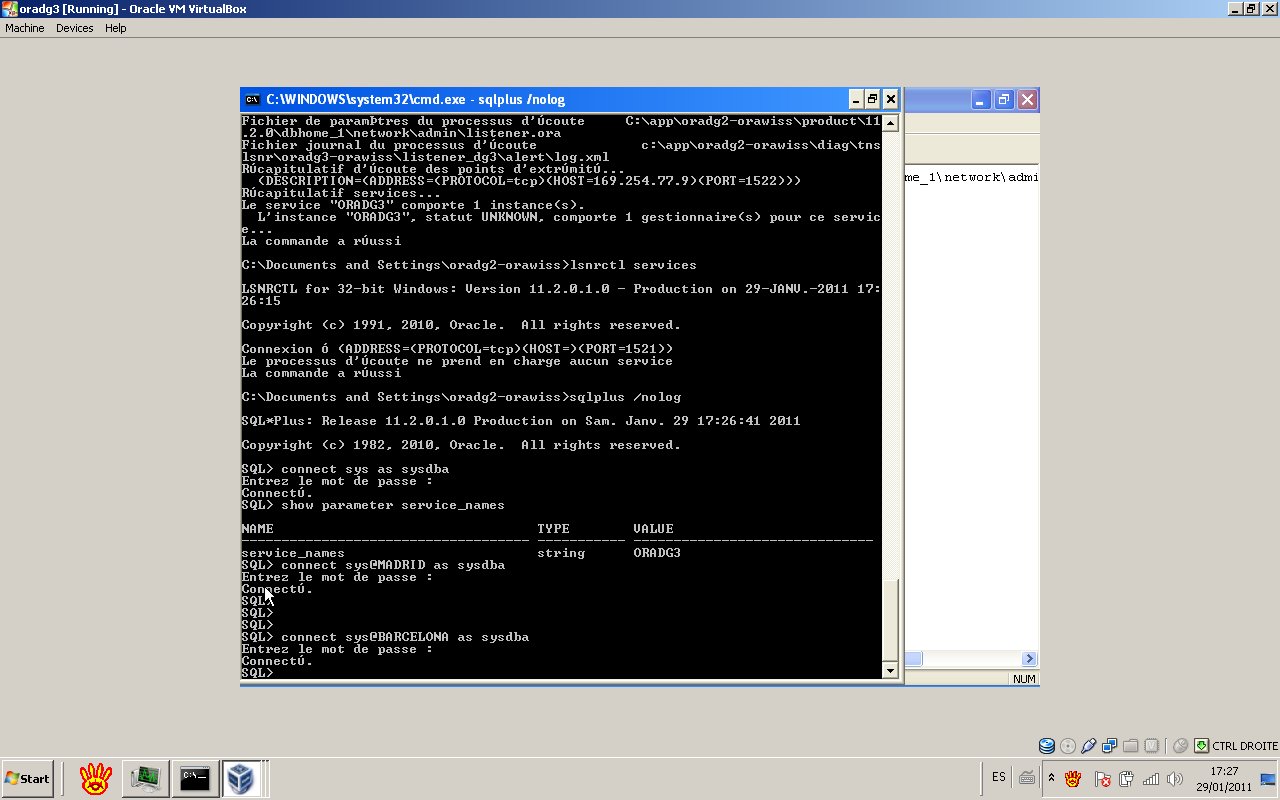
You can use “tnsping” to test the sql connectivity:
4- Setup of the Primary database
- Host name: oradg2
- Database type: Primary
- DB_UNIQUE_NAME=ORAWI11G32
- TNS Alias: BARCELONA
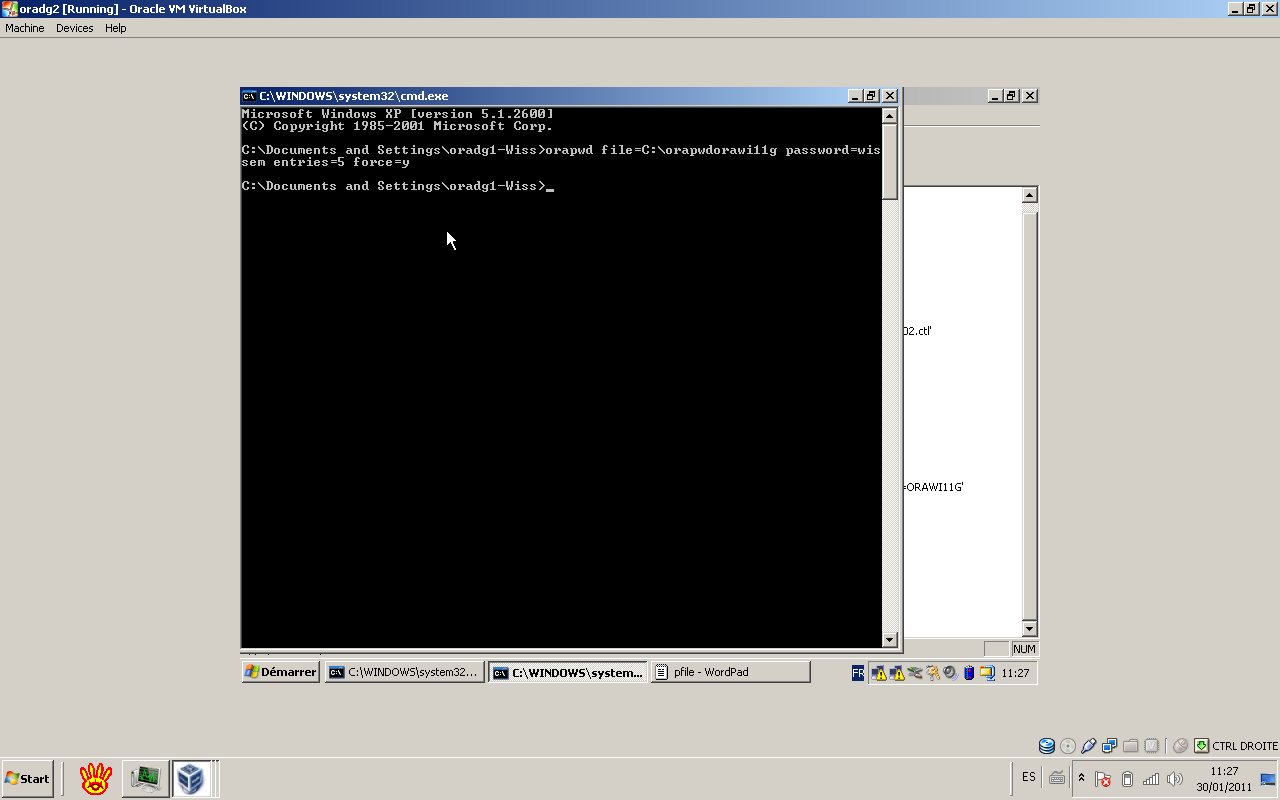
- Create the password file.
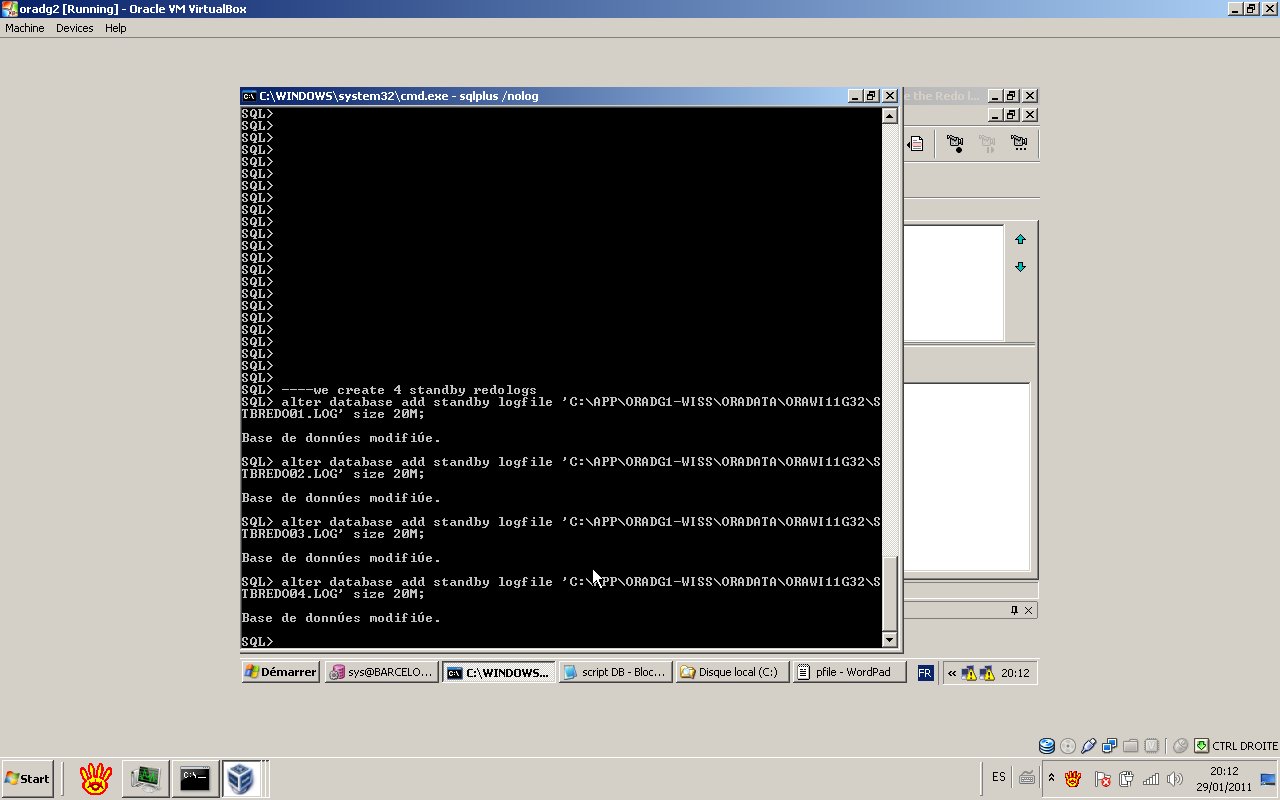
- Create standby redo logs (Number of Standby redo log files=(maximum number of log files for each thread + 1) * maximum number of threads ), in our case 4 SRL.
- Enable force logging (Optional)
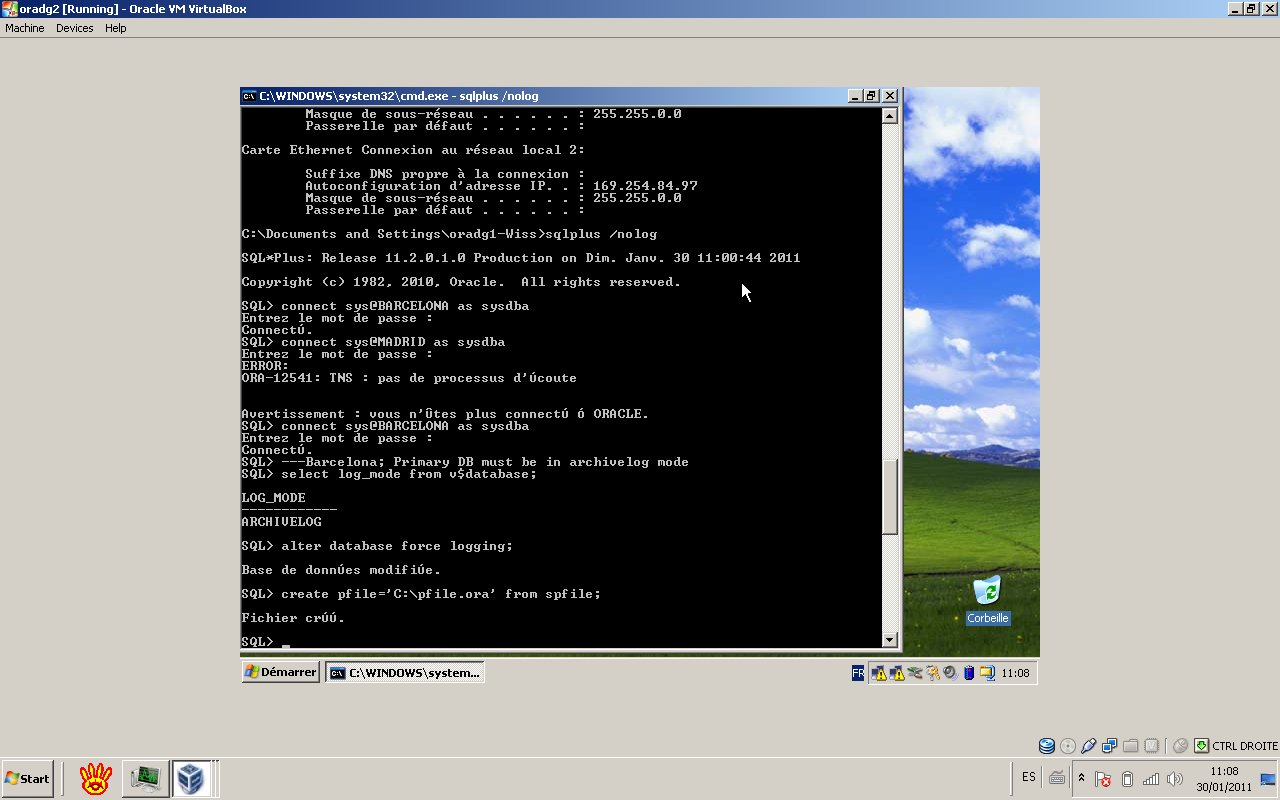
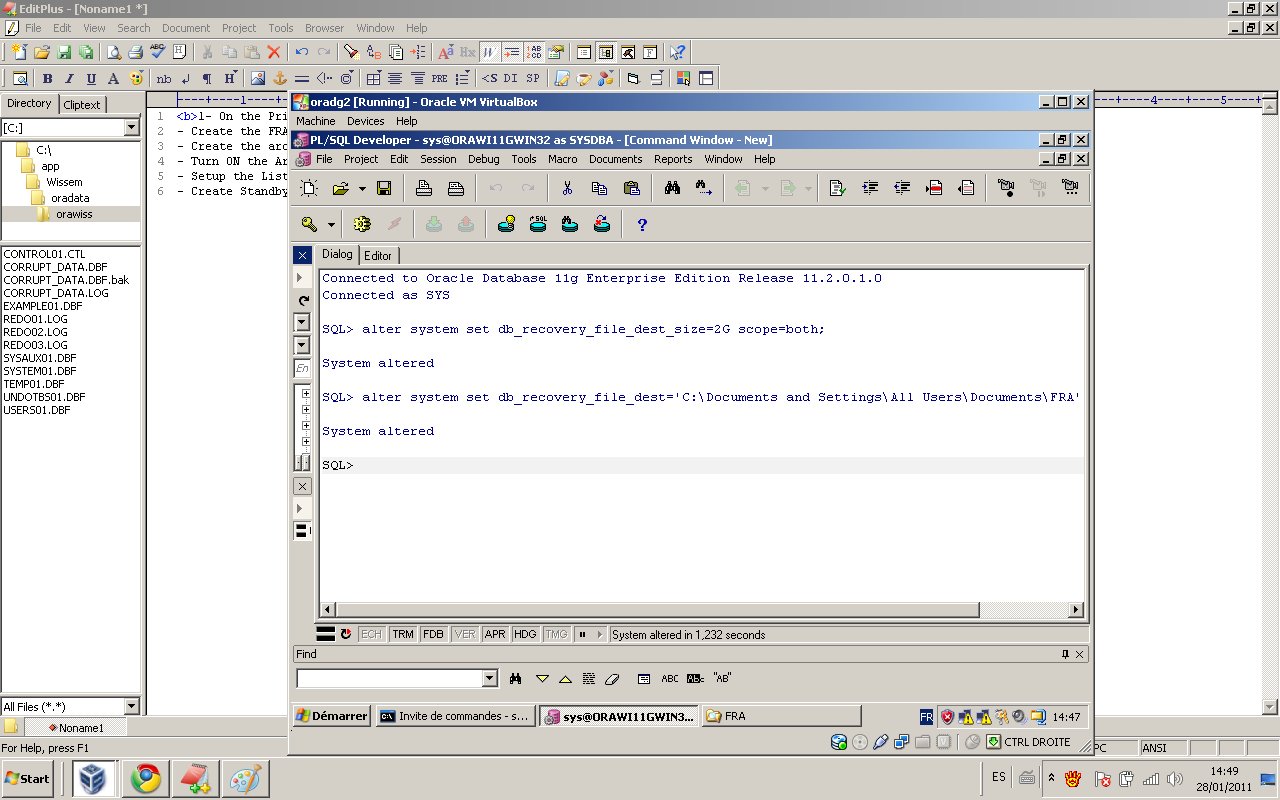
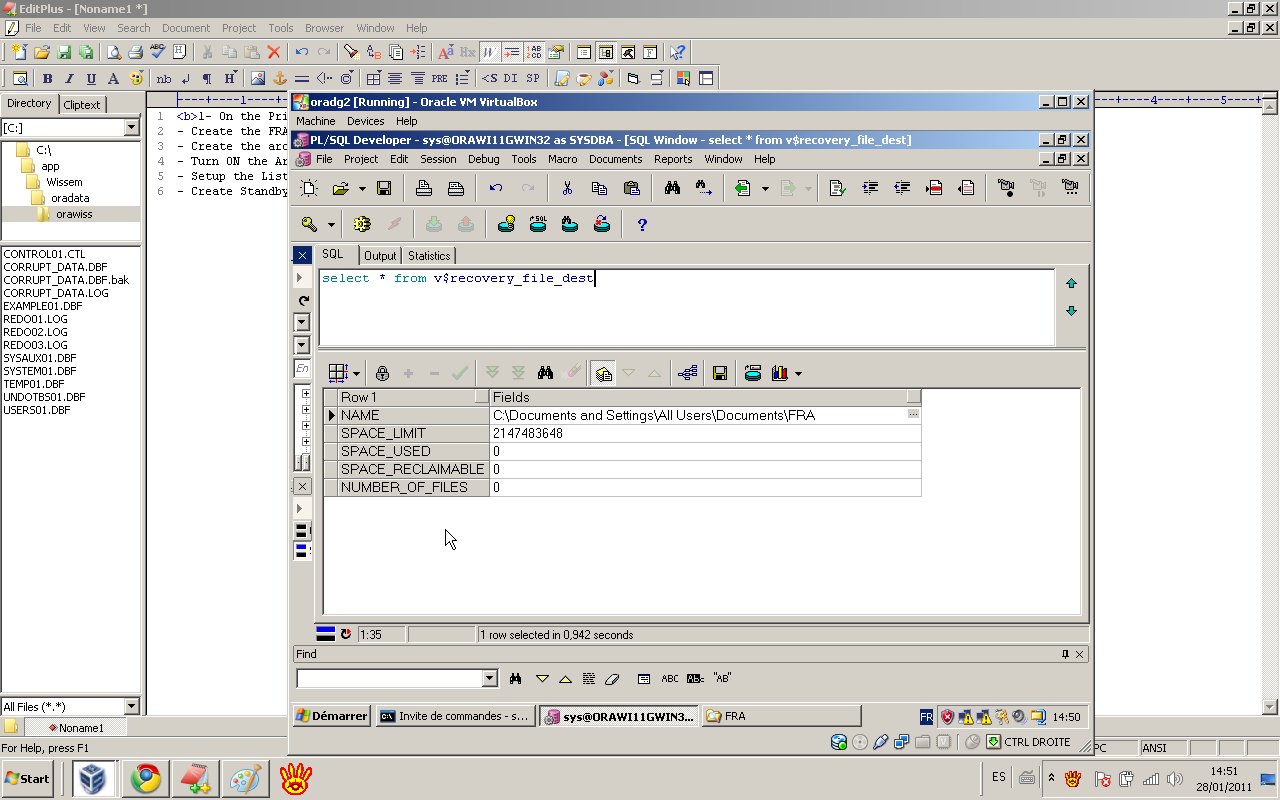
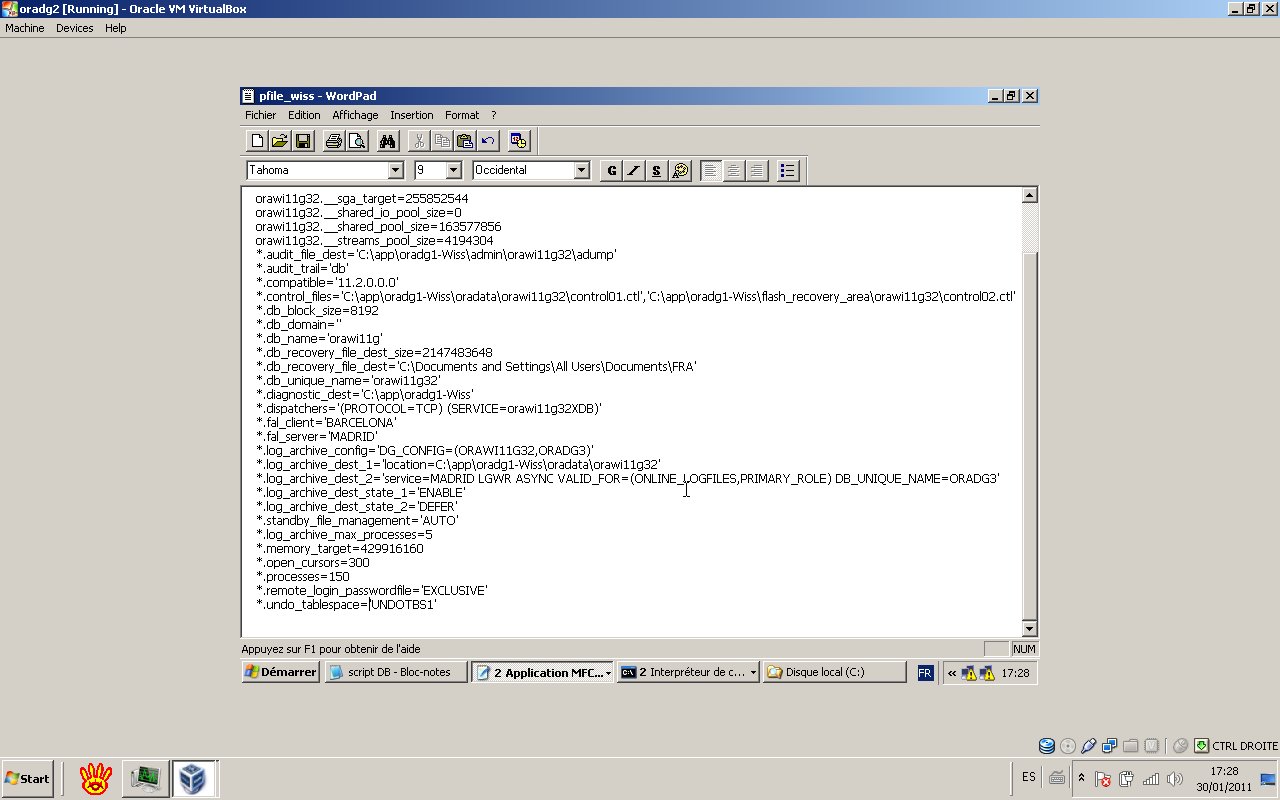
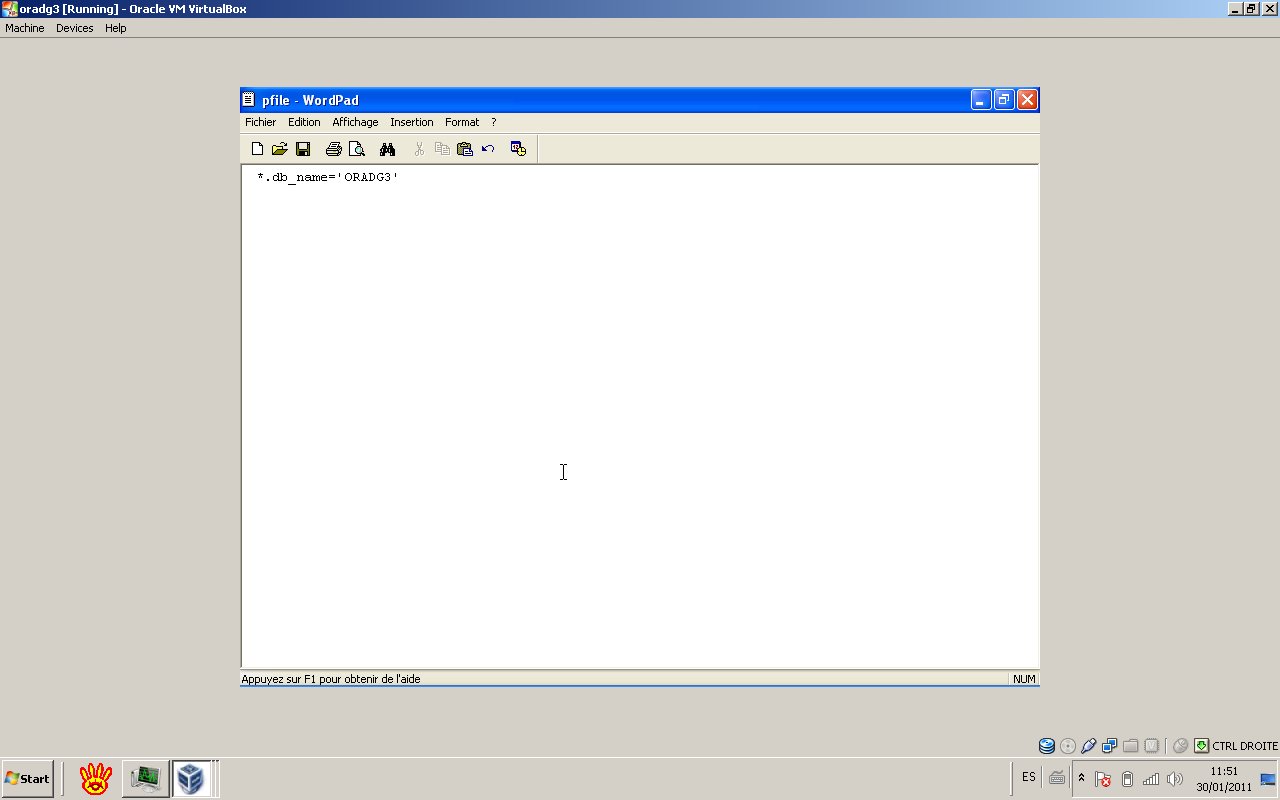
- Configure the pfile of the primary. The content should have the content below;
- Shut down the primary database with shutdown immediate command.
- Create the spfile from the pfile and startup the Primary database.
5- Setup of the Secondary database
- Host name: oradg3
- Database type: Physical standby
- DB_UNIQUE_NAME=ORADG3
- TNS Alias: MADRID
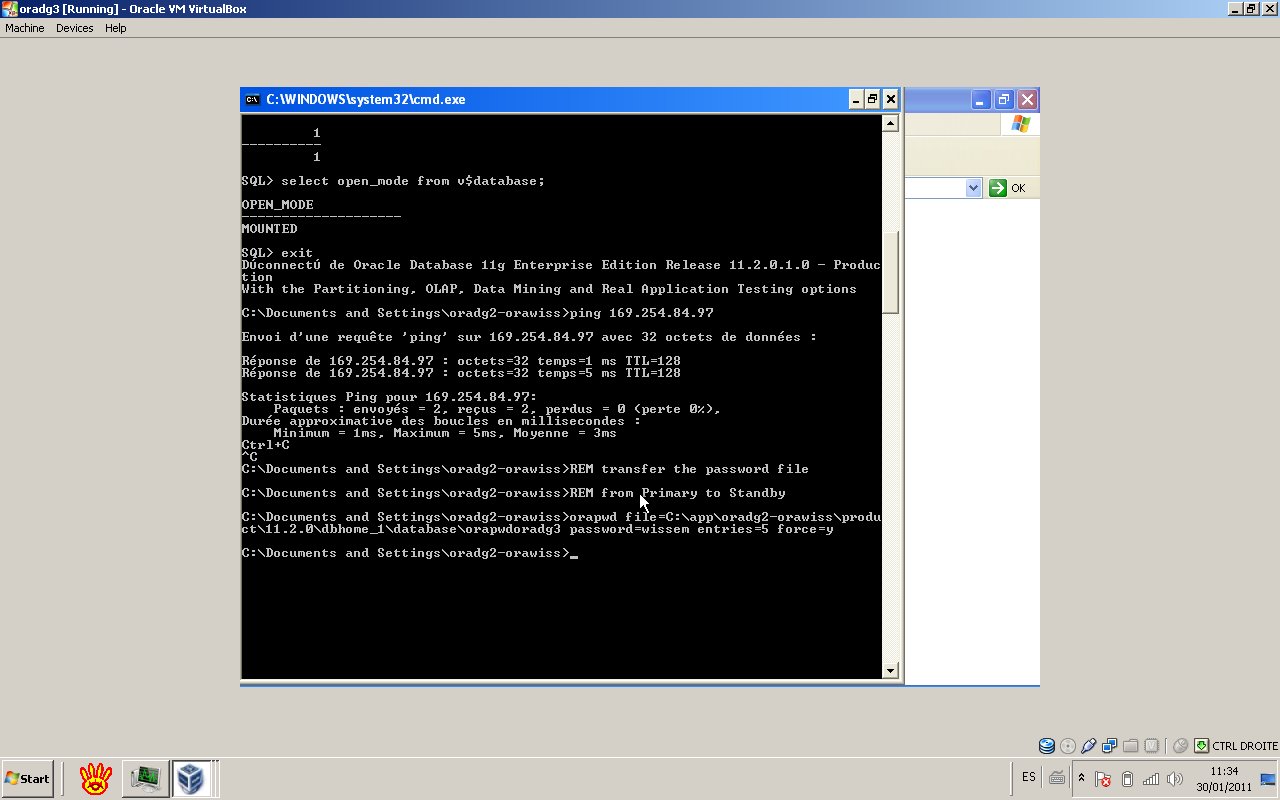
- Copy the password file of the primary to the standby database.
- Create the directory files in the standby database.
- Create an initialization parameter file with only one parameter DB_NAME. DB_NAME=ORADG3
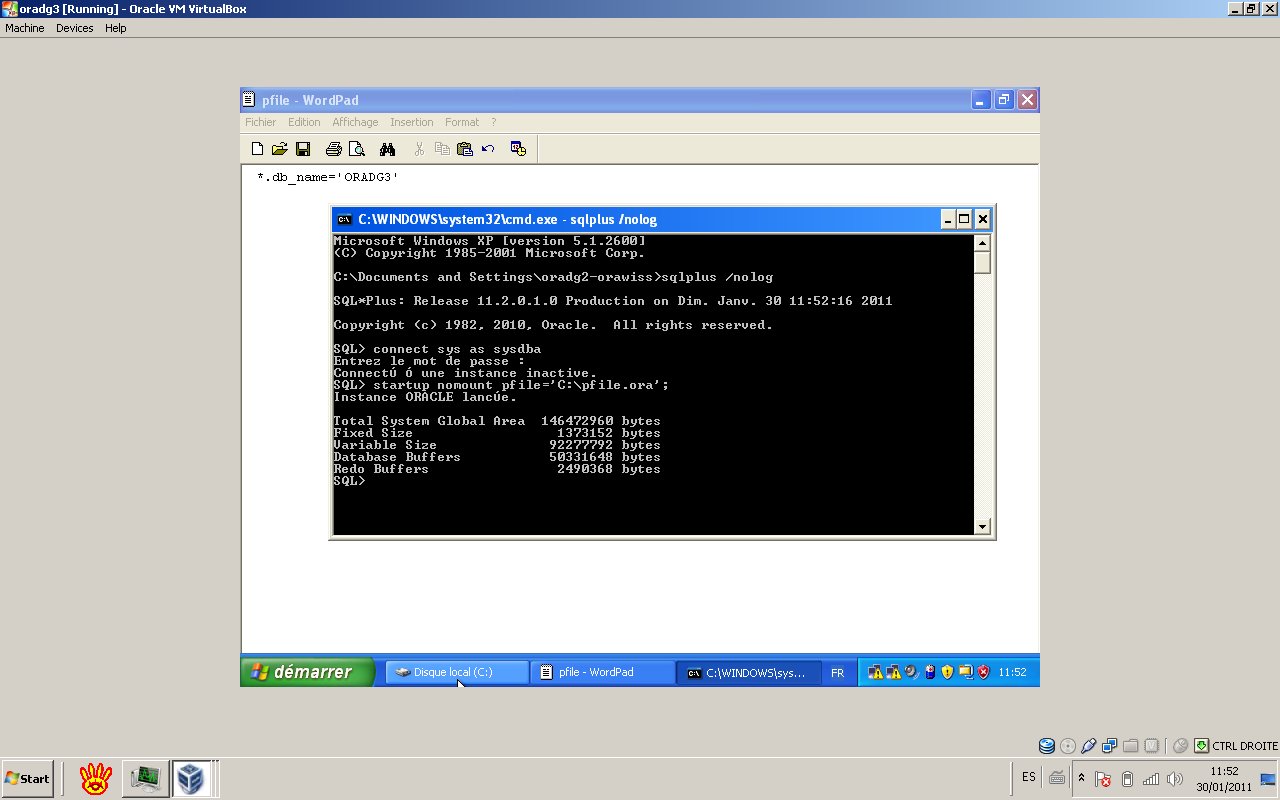
- Start up no mount the database using the pfile.
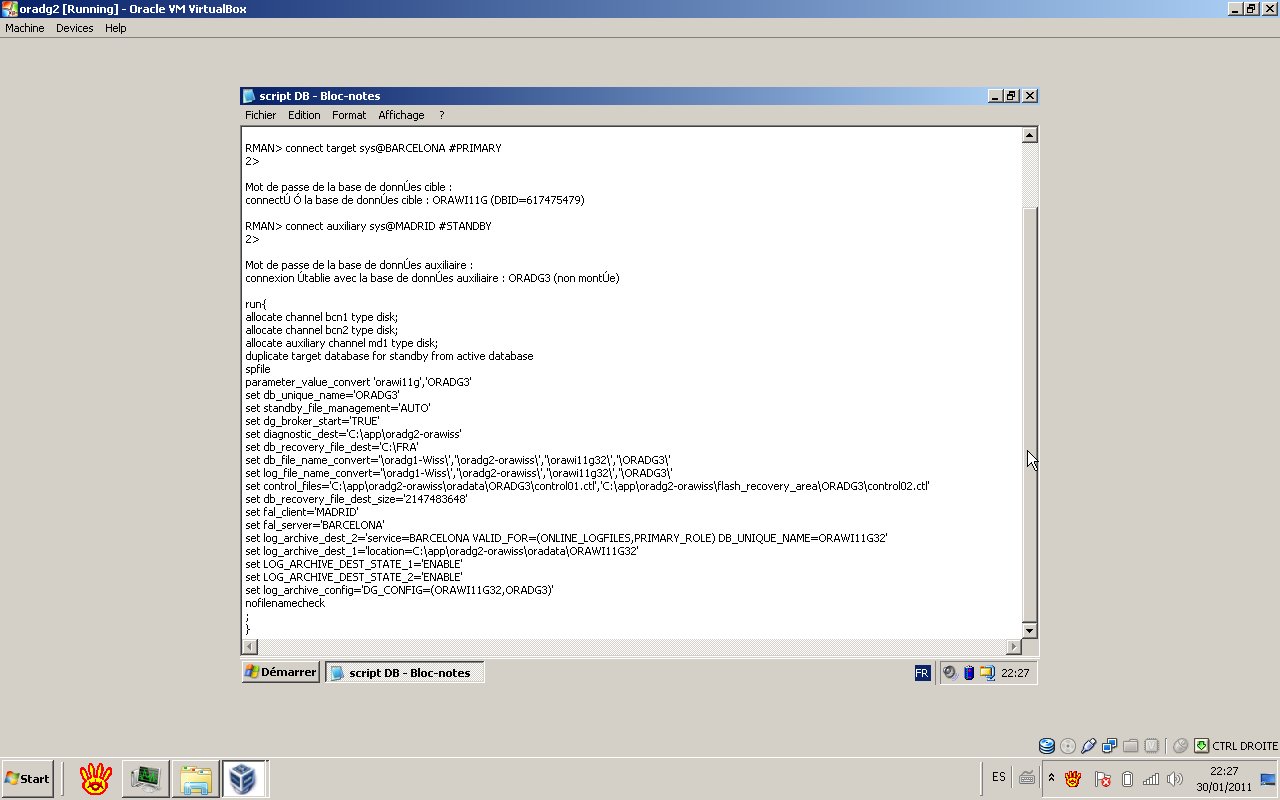
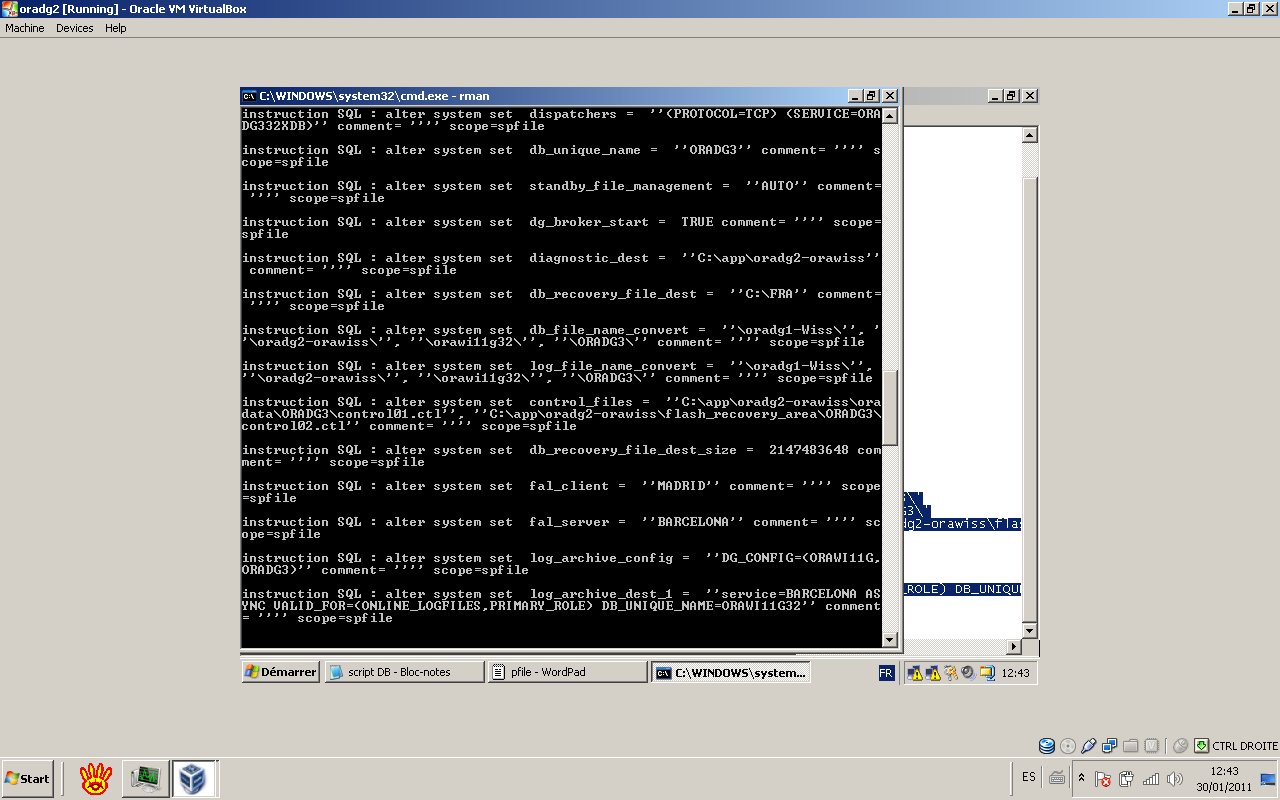
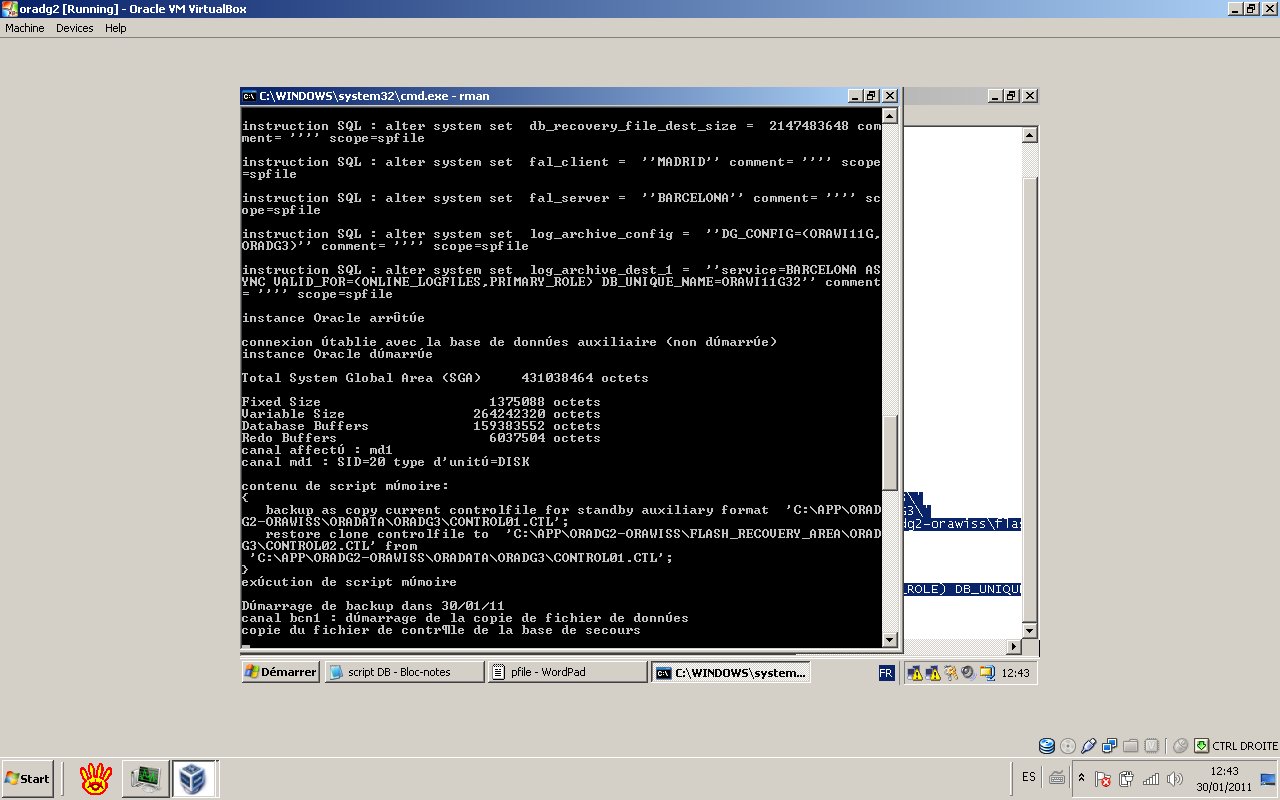
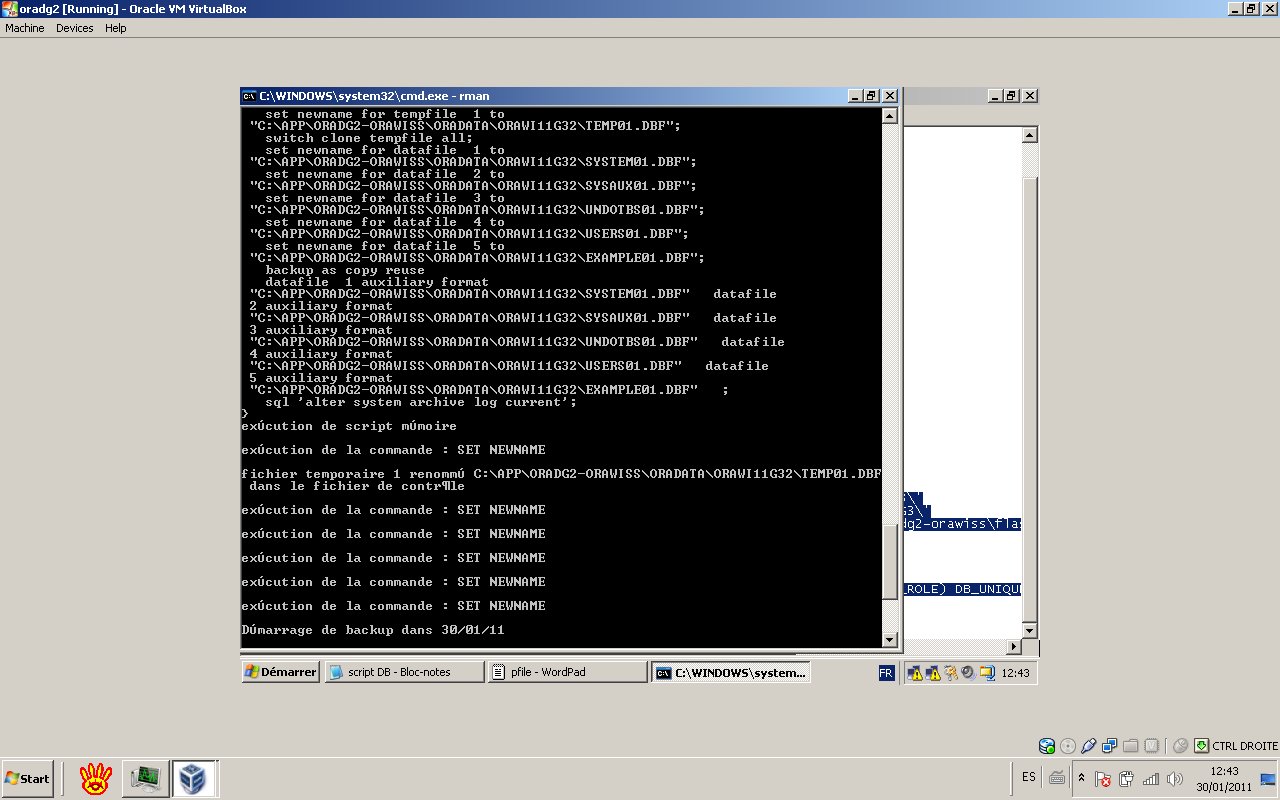
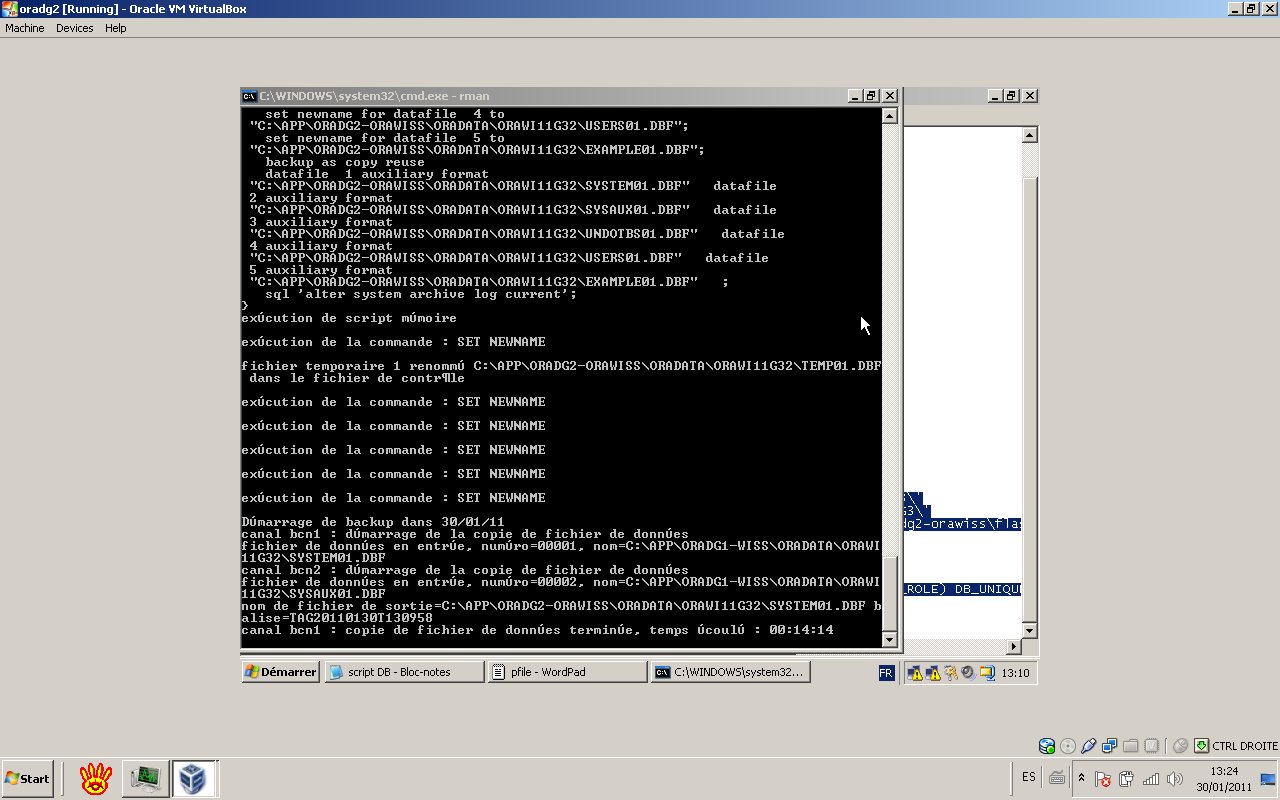
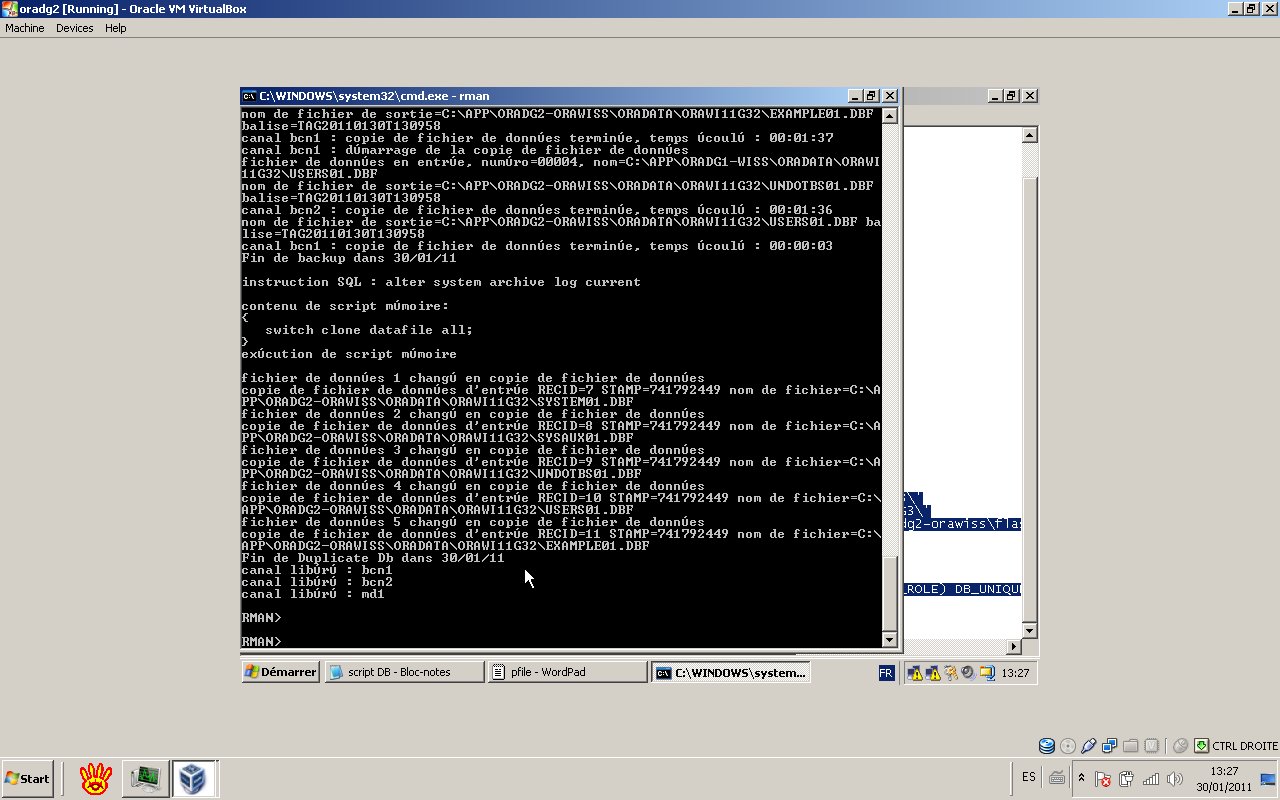
- Run RMAN duplicate script on the primary.
You can use the content below;
6- Verify the log shipping and the application
We are going to include these tests:
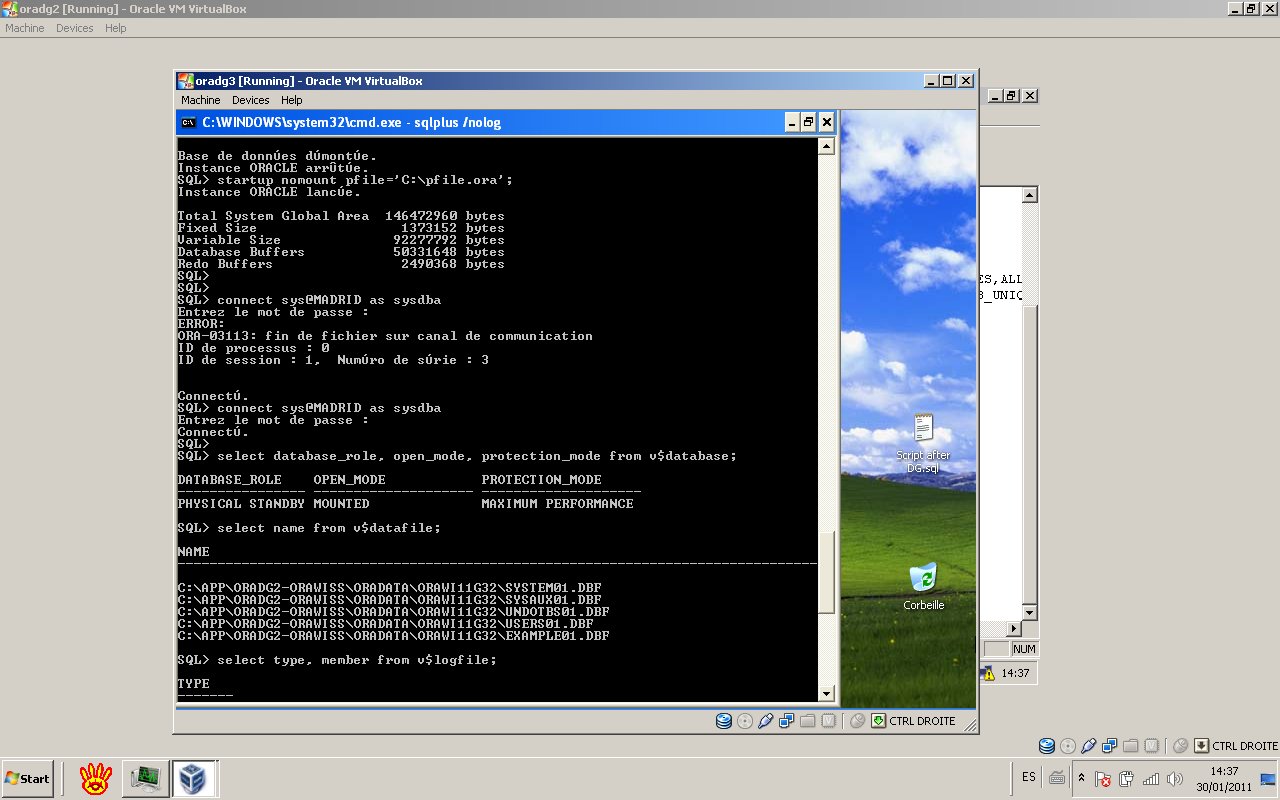
- Query the v$database, v$logfile and v$datafile in the standby database.

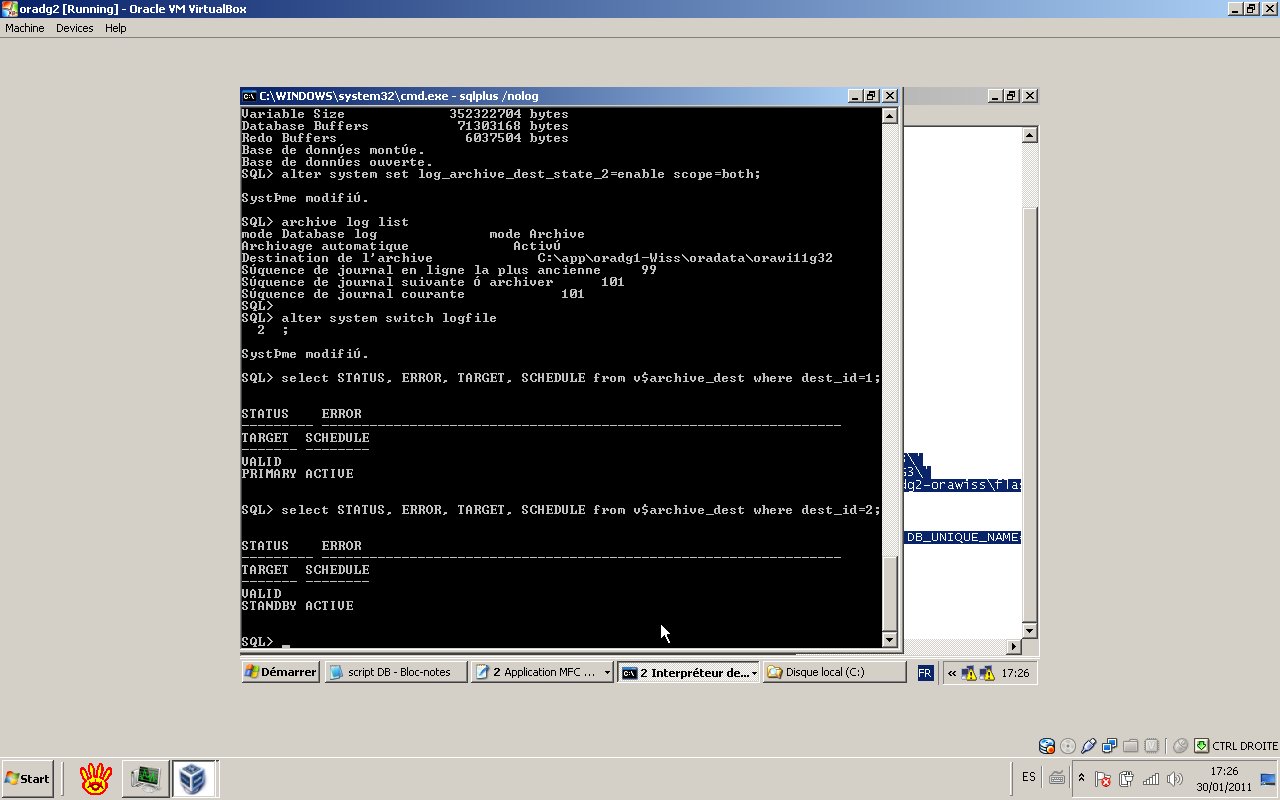
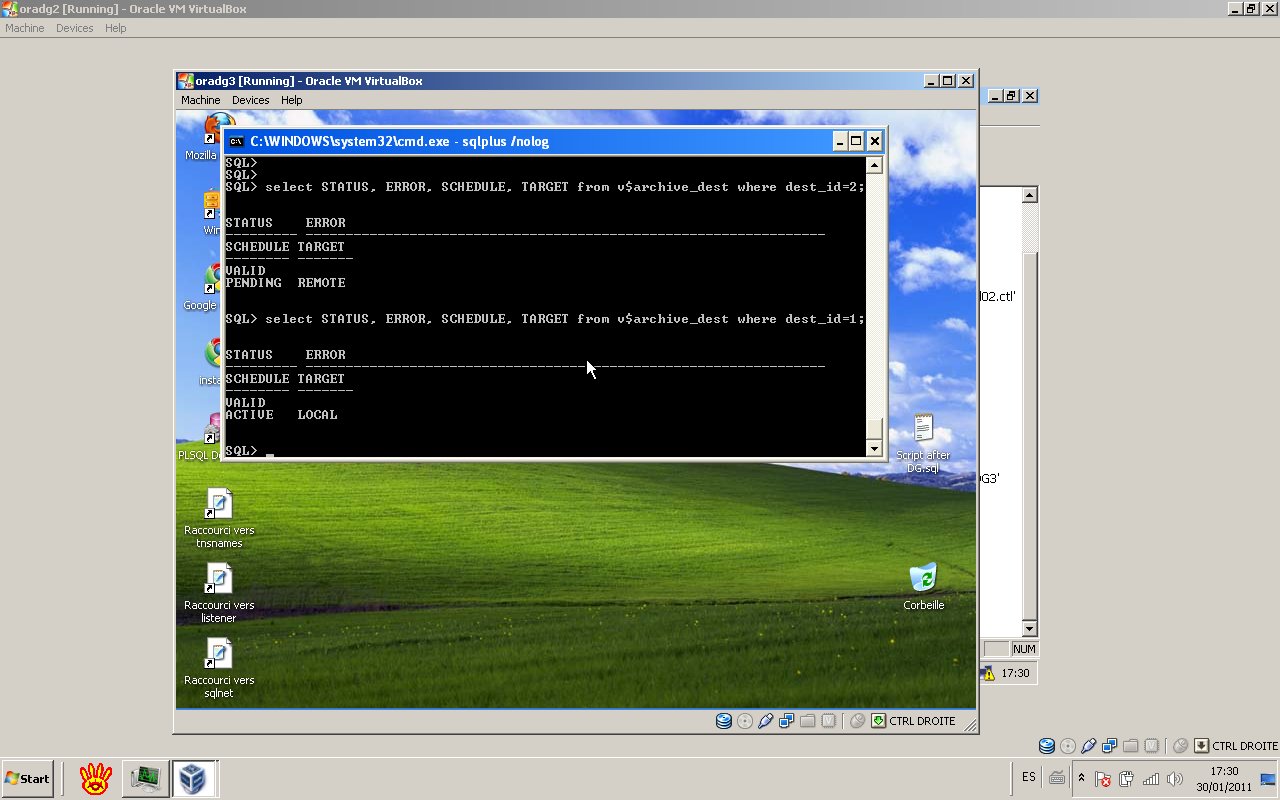
- Check v$archive_dest in both the primary and standby database. The status must be valid for destination ids 1 and 2.
The status of the archives destinations in the Primary:
The status of the archives destinations in the Standby:
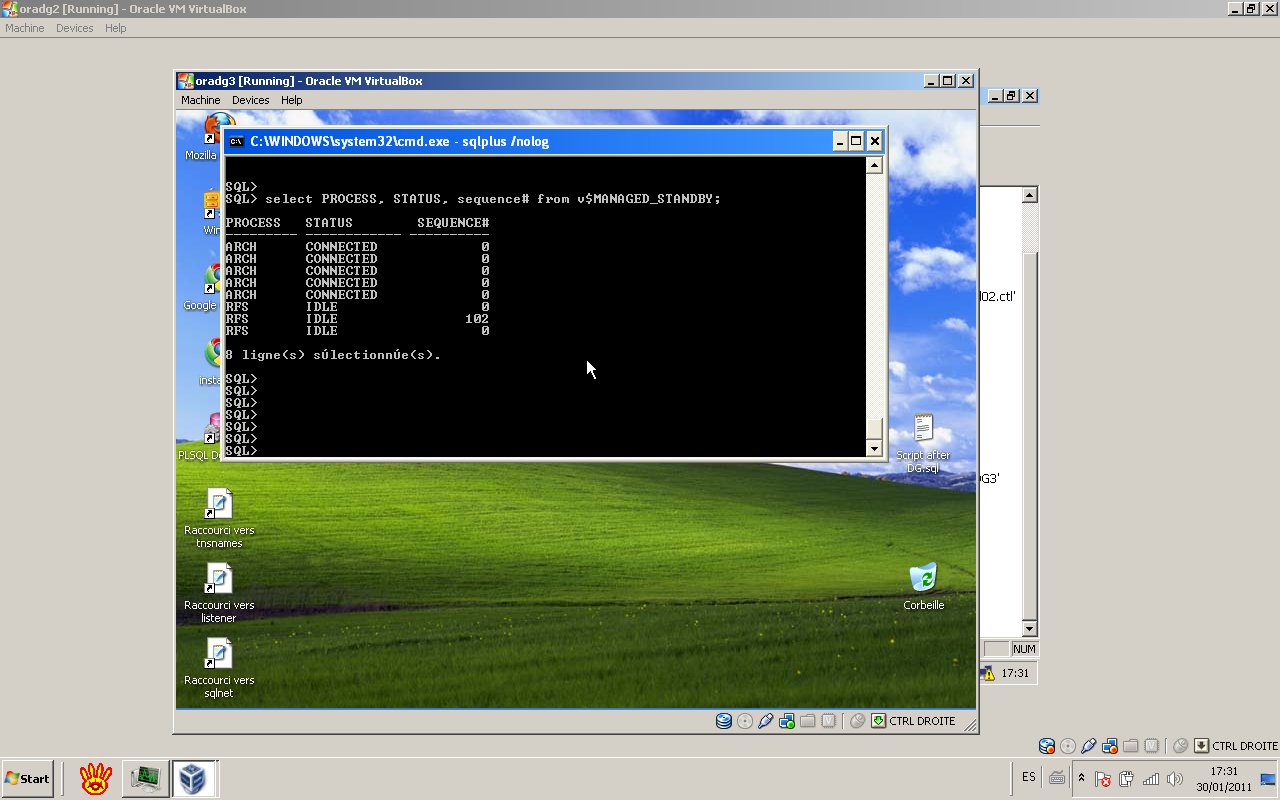
- Check the content of the view v$managed_standby in the standby database.
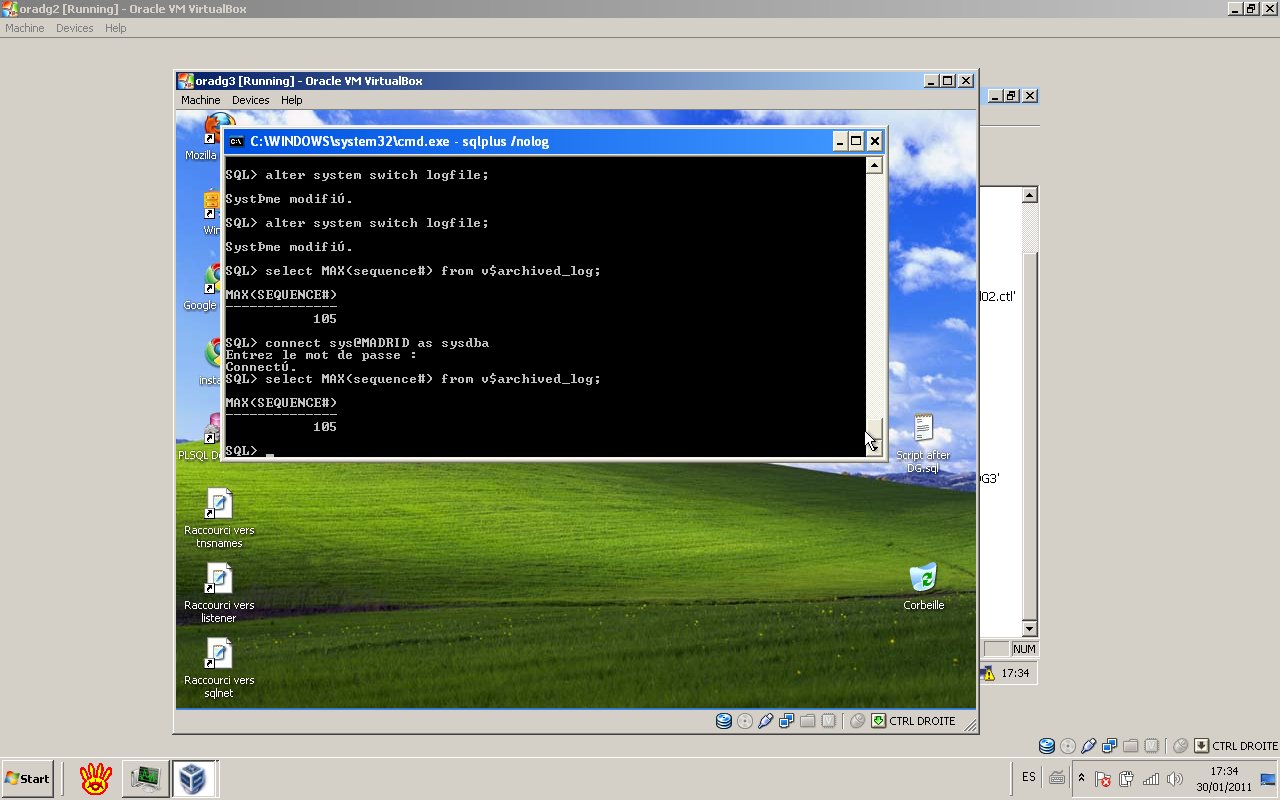
- Check v$archived_log.

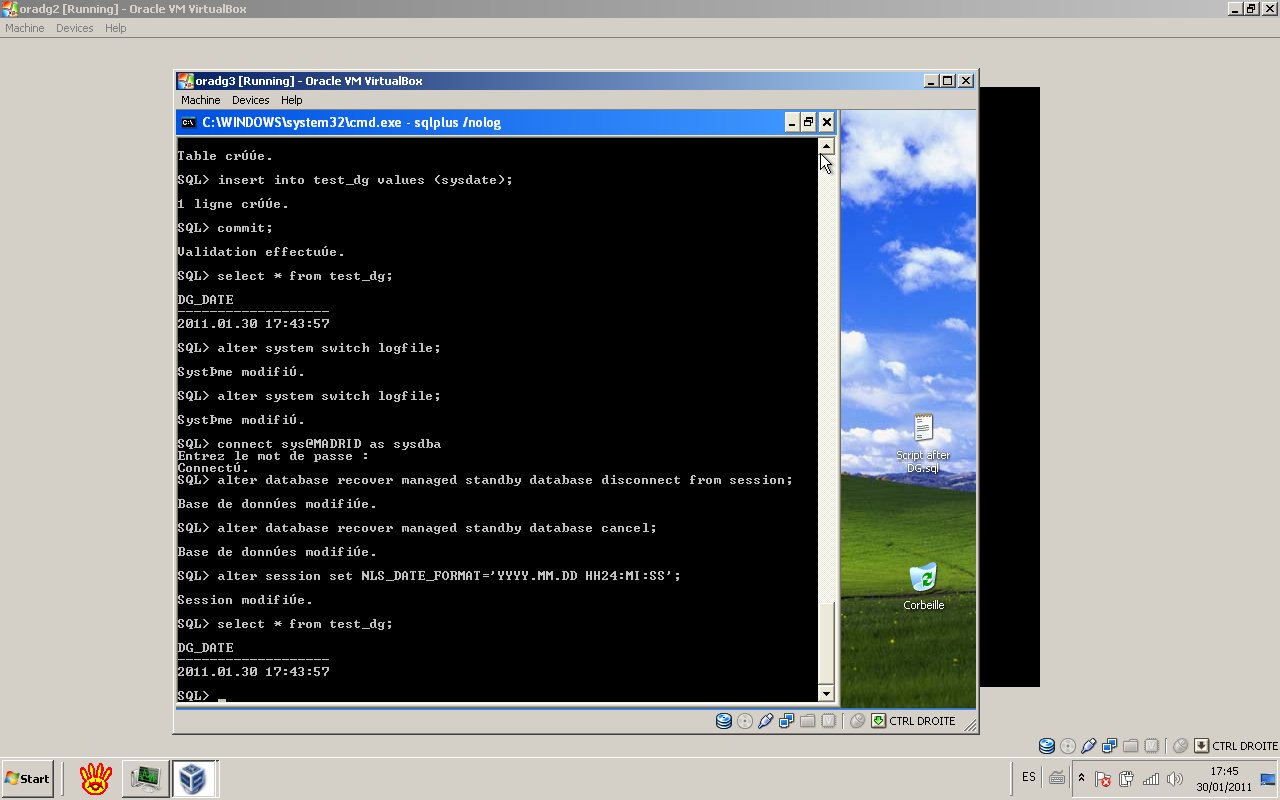
- Create a test table in the primary. then, put the standby database into recover managed standby and check if the table will be shown in the standby database..

7- Active Data Guard option
Oracle Active Data Guard is a new option with Oracle 11g.
Oracle Active Data Guard enables read-only access to a physical standby database for queries, sorting, reporting, Web-based access, and so on, while continuously applying changes received from the production database.
The steps below, to activate the option:
1-Cancel the manager recovery
Recover managed standby database cancel;
2-Open the database in read-only mode
Alter database open read only;
3- Restart the Redo apply
Recovery managed standby database disconnect using current logfile;
- Create database user test in the primary.
- v$dataguard_stats dynamic view.
- Test.
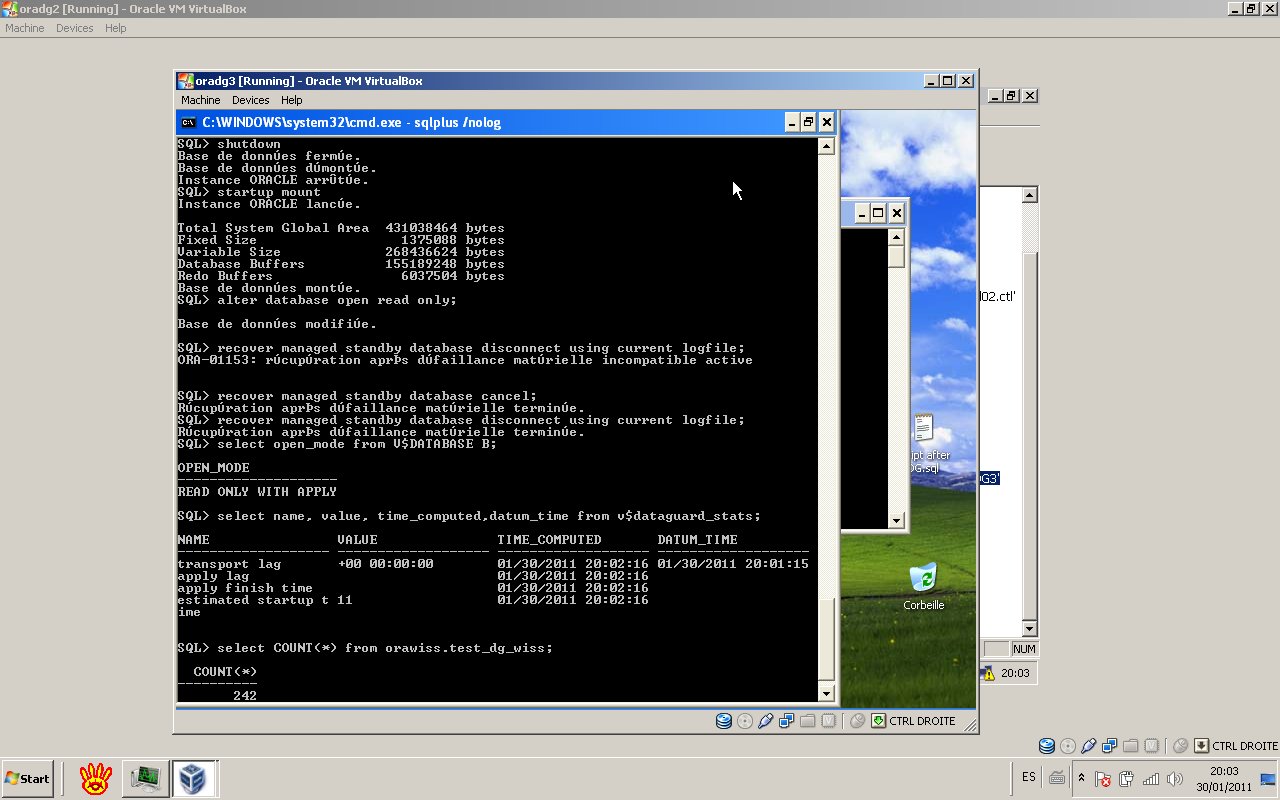
So, in the Primary database we create a new user named orawiss and create a table named test_dg_wiss in orawiss schema.
We insert 242 records into the test_dg_wiss table.
We check that the table is not available in the Standby database (See below).

shutdown ;
startup mount;
alter database open read only;
recover managed standby database cancel;
recovery managed standby database disconnect using current logfile;
select count(*) from orawiss.test_dg_wiss;
=> we have 242 rows.
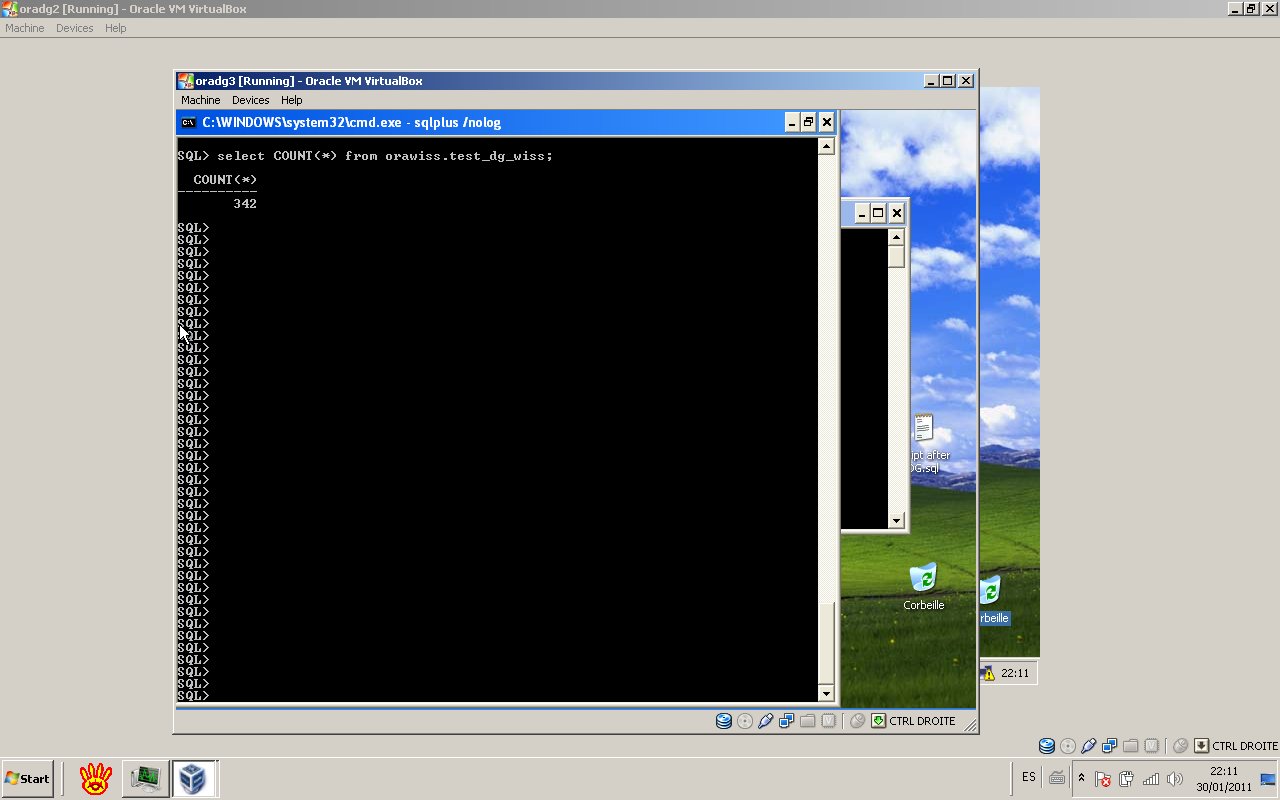
Now, we insert more rows into the table orawiss.test_dg_wiss in the Primary database, see below;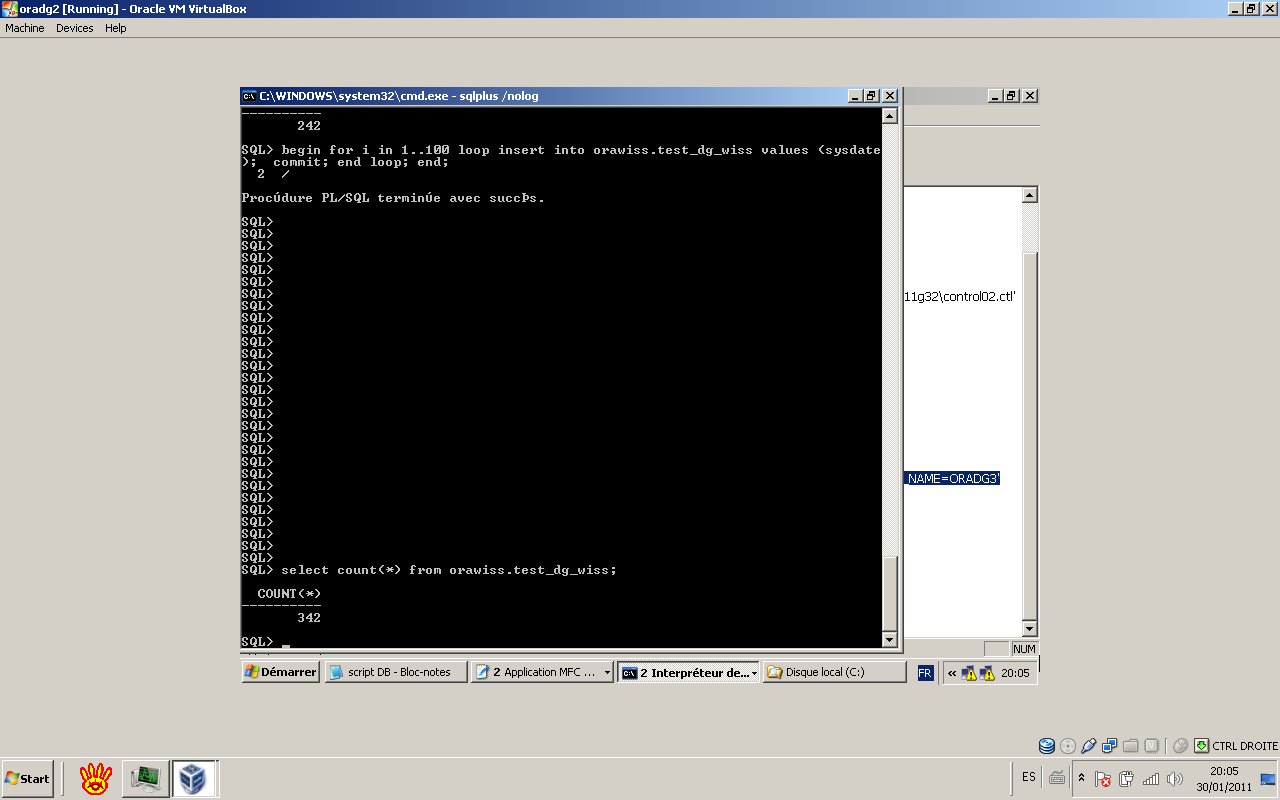
Without apply a log switch, the data are there in the Standby database(read only mode), we count the number of rows in orawiss.test_dg_wiss
and we find the 342 records.
8- Summary
In this article;
- We have created a physical standby database using RMAN.
- We checked the Data Guard health using dynamic views.
- We turn on and tested the active Data Guard option.
Please refer to my other article “Step by step creation of physical standby database in 10gR2″, following the link below:
“Step by step creation of physical standby database in 10gR2″
Nice reeading!
Wissem EL KHLIFI